If you have a pool at your home, you know how important it is to keep it well-maintained. One crucial aspect of pool maintenance is ensuring that the pool light bulbs are in good working condition. Over time, these bulbs may need to be replaced, and knowing how to do it yourself can save you time and money. In this comprehensive guide, we will walk you through the process of changing a pool light bulb step by step.
Step 1: Safety First
Before you start any work on the pool light, it’s essential to ensure your safety. Turn off the power to the pool light at the circuit breaker to avoid the risk of electric shock. You should also test the light to make sure it’s completely off before proceeding.
Credit: www.poolsupplyunlimited.com
Step 2: Gather the Necessary Tools
Next, gather all the tools you’ll need for the job. You will likely need a screwdriver, a pair of pliers, and a new pool light bulb. Make sure the replacement bulb is the correct type and size for your specific pool light fixture.
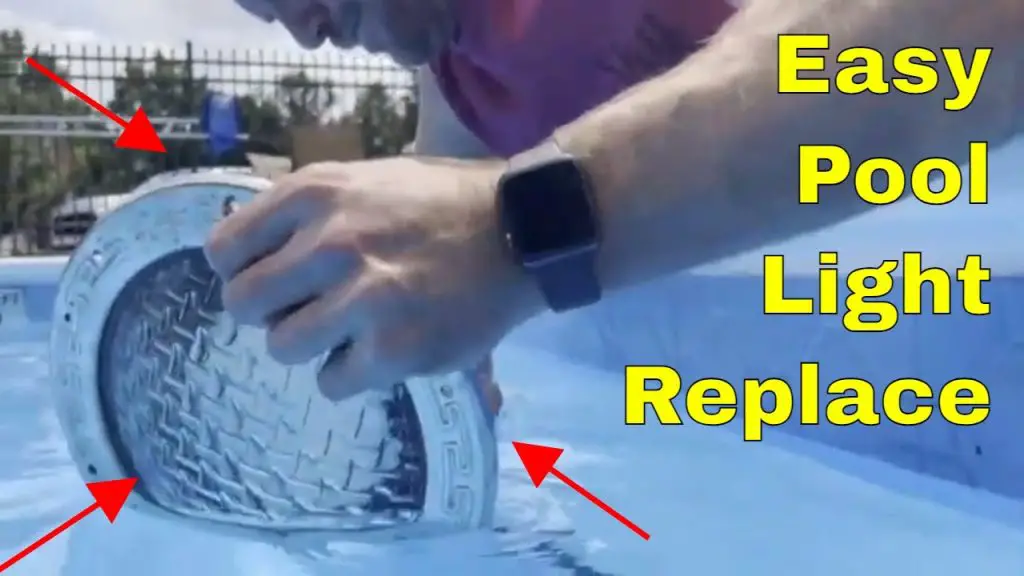
Step 3: Access the Pool Light Fixture
Most pool light fixtures are accessed by removing the light fixture cover. This cover is typically held in place by a few screws. Use the appropriate screwdriver to remove the screws and carefully take off the cover. Set the screws and the cover aside in a safe place so that you can easily find them when it’s time to reassemble the fixture.

Credit: www.youtube.com
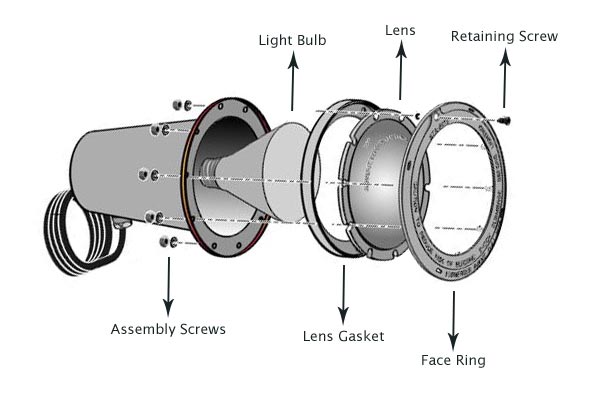
Step 4: Remove the Old Bulb
Once the cover is off, you will see the old pool light bulb. Before you remove it, take note of how it is positioned in the fixture so that you can install the new bulb correctly. Use the pliers to gently unscrew the old bulb from the fixture, being careful not to break it.
Step 5: Install the New Bulb
Carefully insert the new pool light bulb into the fixture, making sure it is securely in place. Use the pliers to tighten the bulb, but be cautious not to overtighten it, as this can damage the bulb or the fixture. Double-check the positioning of the new bulb to ensure it is aligned correctly.
Step 6: Reassemble the Fixture
Once the new bulb is securely in place, it’s time to reassemble the pool light fixture. Carefully position the cover back over the fixture and use the screws to secure it in place. Make sure the cover is snug and properly aligned to prevent any water from seeping into the fixture.
Step 7: Test the Light
After you’ve reassembled the fixture, it’s time to test the pool light. Turn the power back on at the circuit breaker and check to see if the light is working properly. If the light comes on as expected, you’ve successfully changed the pool light bulb. If not, double-check the connections and the positioning of the bulb to ensure everything is in order.
Step 8: Regular Maintenance
Now that you’ve successfully changed the pool light bulb, it’s essential to keep up with regular maintenance to ensure the longevity of the new bulb. Regularly inspect the light fixture for any signs of damage or wear, and promptly address any issues to prevent further damage and ensure the safety of your pool.
Conclusion
Changing a pool light bulb is a manageable task that can be easily accomplished with the right tools and a clear understanding of the process. By following the steps outlined in this guide, you can confidently maintain your pool’s lighting system and enjoy a well-lit and safe swimming environment. Remember to prioritize safety and proper maintenance to keep your pool in top condition for years to come.
With this comprehensive guide, you are now equipped with the knowledge to tackle the task of changing a pool light bulb with confidence. By following these step-by-step instructions, you can ensure that your pool remains well-lit and inviting for all your swimming and leisure activities. Remember to prioritize safety and regular maintenance to keep your pool in top condition and enjoy many years of sparkling, well-lit enjoyment.