Creating a paper pond can be a fun and creative activity for both children and adults. Whether you want to add a touch of nature to your home or simply enjoy the craft of paper folding, making a paper pond is a great way to express your creativity. In this step-by-step guide, we will show you how to make a beautiful paper pond that you can display proudly.
Materials Needed:
Before we begin, let’s gather the materials you will need to make your paper pond:
| Materials | Tools |
|---|---|
| – Blue construction paper | – Scissors |
| – Green construction paper | – Glue |
| – Brown construction paper | |
| – Small pebbles or sand |
Step 1: Create the Base
Start by taking the blue construction paper and cutting it into a large oval shape. This will be the base of your paper pond. Make sure the oval shape is big enough to create a realistic pond scene.
Step 2: Add the Shoreline
Next, take the brown construction paper and cut it into thin strips. Glue these strips around the edge of the blue oval to create the shoreline of the pond. This will give your paper pond a more natural and realistic look.
Step 3: Make the Water Plants
Now, it’s time to create the water plants for your pond. Take the green construction paper and cut out various shapes to represent lily pads and other aquatic plants. Arrange these paper plants on the blue base to create a lush and vibrant pond ecosystem.
Credit: m.youtube.com
Step 4: Add Detail with Pebbles or Sand
To add more detail to your paper pond, sprinkle small pebbles or sand around the shoreline. This will give your pond a textured and realistic appearance, making it more visually appealing.
Step 5: Personalize Your Pond
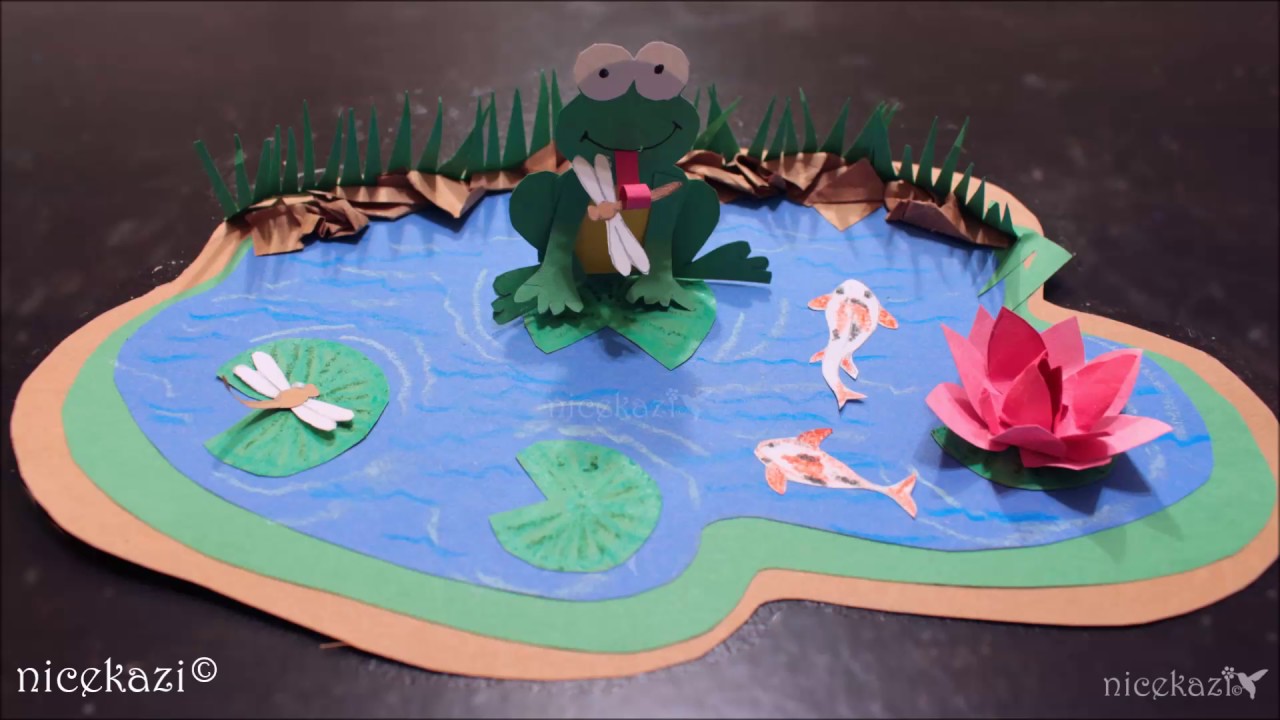
Feel free to get creative and personalize your paper pond with additional decorations. You can add paper fish, frogs, or even a tiny paper boat to make your pond scene come to life.

Credit: www.tiktok.com
Step 6: Display Your Paper Pond
Once you are satisfied with your paper pond creation, find a suitable spot to display it. Your paper pond can be a lovely addition to your home decor, or you can give it as a thoughtful handmade gift to a friend or family member.
Tips for Making a Stunning Paper Pond:
- Experiment with different shades of blue and green paper to create depth in your pond.
- Use a combination of scissors and craft punches to create intricate plant shapes.
- Consider adding small LED lights to your paper pond to give it a magical glow.
- Try incorporating small paper butterflies or dragonflies for an added touch of whimsy.
Benefits of Making a Paper Pond:
Making a paper pond is not only a fun and creative activity, but it also offers several benefits:
- Improves hand-eye coordination through cutting and gluing activities.
- Enhances creativity and imagination by designing your own pond ecosystem.
- Provides a relaxing and meditative experience as you focus on crafting the details.
- Offers a unique and personalized decor piece that you can proudly display.
In Conclusion
Making a paper pond is a delightful craft that allows you to unleash your creativity and bring a touch of nature into your home. By following the steps outlined in this guide and adding your personal flair, you can create a stunning paper pond that will surely impress both yourself and others. So, gather your materials, let your imagination soar, and enjoy the process of making your very own paper pond masterpiece!