Creating a concrete pond in your backyard can add a touch of elegance and serenity to your outdoor space. Not only does it enhance the aesthetic appeal of your garden, but it also provides a habitat for aquatic plants and fish. In this guide, we will walk you through the step-by-step process of building your very own concrete pond.
Materials Needed
Before you begin construction, gather all the necessary materials:
- Concrete mix
- Reinforcing mesh
- Pond liner
- Water pump and filter
- Rocks or pebbles for decoration
- Shovel
- Trowel
- Rubber gloves
- Level
- Measuring tape
Step 1: Planning
Start by deciding on the size and shape of your pond. Consider the available space in your backyard and the overall design of your garden. Sketch out a plan on paper to visualize the layout.

Credit: www.youtube.com
Step 2: Excavation
Use a shovel to dig out the area where the pond will be located. Make sure to create a level base for the pond. Remove any rocks or debris from the excavation site.
Step 3: Building the Frame
Construct a frame using wooden boards to outline the shape of the pond. This will help contain the concrete mix and create a defined edge for the pond.

Credit: www.motherearthnews.com
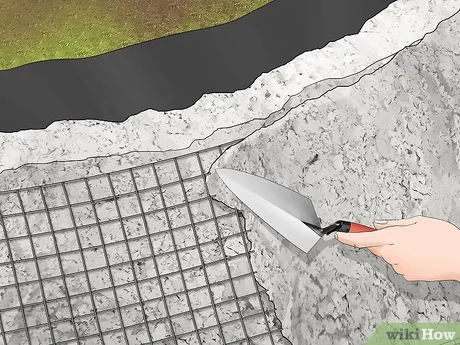
Step 4: Reinforcement
Place reinforcing mesh inside the frame to add strength to the concrete structure. This will prevent cracking and ensure the durability of the pond.
Step 5: Mixing the Concrete
Follow the instructions on the concrete mix packaging to prepare the mixture. Use a wheelbarrow and a shovel to mix the concrete until it reaches a smooth consistency.
Step 6: Pouring the Concrete
Carefully pour the mixed concrete into the framed area. Use a trowel to spread the concrete evenly and smooth out the surface. Make sure the concrete is level throughout the pond.
Step 7: Curing
Allow the concrete to cure for the recommended time as per the instructions on the packaging. This process is crucial for the concrete to harden and set properly.
Step 8: Adding the Pond Liner
Once the concrete has cured, place a pond liner inside the pond to create a waterproof barrier. Make sure the liner fits snugly and covers the entire surface of the pond.
Step 9: Filling the Pond
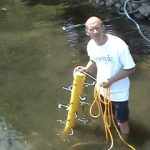
Fill the pond with water using a garden hose. Add a water pump and filter to keep the water clean and circulating. This will help maintain a healthy environment for aquatic life.
Step 10: Decorating
Finally, decorate the pond with rocks, pebbles, and aquatic plants to enhance its visual appeal. You can also add fish to create a lively and dynamic ecosystem within the pond.
Maintenance Tips
Here are some maintenance tips to keep your concrete pond in top condition:
- Regularly check and clean the filter to ensure proper water circulation.
- Remove debris such as leaves and twigs to prevent clogging.
- Monitor the water quality and pH levels to maintain a healthy environment for fish and plants.
- Trim and prune aquatic plants as needed to prevent overgrowth.
- Inspect the pond liner for any tears or leaks and repair them promptly.
By following these steps and tips, you can create a beautiful and functional concrete pond in your backyard. Enjoy the soothing sound of water and the tranquil atmosphere that a pond brings to your outdoor space.