Creating a pond can be a rewarding project that adds beauty and tranquility to your outdoor space. However, the process of filling in a pond requires careful planning and execution to ensure its success. In this guide, we will explore the steps involved in filling in a pond, from preparation to completion.

Credit: m.youtube.com
Step 1: Drain the Pond
The first step in filling in a pond is to drain the water completely. This can be done using a pump or by allowing the water to naturally drain out over time. Make sure to remove any fish or plants from the pond before draining the water.
Step 2: Remove Debris
Once the pond is drained, it is important to remove any debris such as rocks, plants, and other objects that may be present at the bottom. Clearing the area will make it easier to fill in the pond with soil.
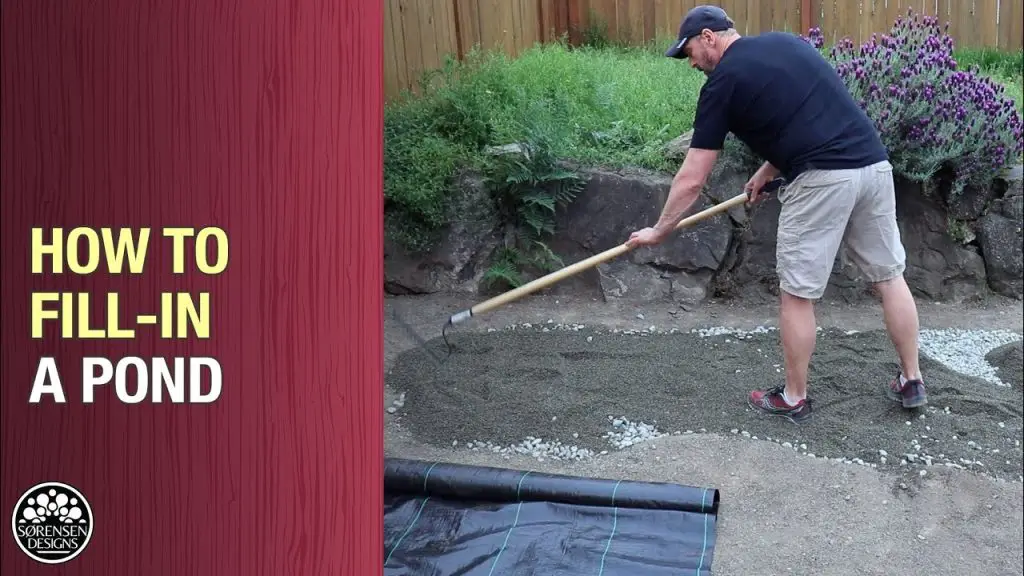
Step 3: Fill in the Pond
After the pond is drained and cleared of debris, it is time to fill it in with soil. Choose a high-quality soil that is free of chemicals and pollutants. Begin filling in the pond from the center and work your way outwards, ensuring that the soil is evenly distributed.
Step 4: Compact the Soil
Once the pond is filled with soil, use a compactor or a heavy roller to compact the soil. This will help prevent settling and ensure a stable base for any landscaping or structures that will be placed on top of the filled-in pond.
Step 5: Add Topsoil
After compacting the soil, add a layer of topsoil to the surface. Topsoil is rich in nutrients and will provide a fertile base for planting grass, flowers, or other vegetation on top of the filled-in pond.

Credit: www.yardfocus.com
Step 6: Level the Area
Once the topsoil is added, use a rake or a leveling tool to even out the surface of the filled-in pond area. Make sure the area is smooth and level to create a clean canvas for landscaping or other outdoor projects.
Step 7: Plant Vegetation
Now that the pond is filled in and the area is leveled, it is time to plant vegetation. Choose plants that are suitable for the climate and soil conditions in your area. Consider adding a mix of grasses, flowers, and shrubs to create a diverse and visually appealing landscape.
Step 8: Add Mulch
To help retain moisture and suppress weed growth, add a layer of mulch around the planted vegetation. Mulch also adds a decorative touch to the filled-in pond area and helps maintain soil temperature.
Step 9: Install a Water Feature (Optional)
If you want to maintain a water element in your outdoor space, consider installing a water feature such as a fountain or a small pond. This can add a soothing ambiance to the area and create a focal point for your landscaping.
Step 10: Maintain the Area
Regular maintenance is key to keeping the filled-in pond area looking its best. Water plants regularly, remove weeds, and replenish mulch as needed. With proper care, your filled-in pond can continue to enhance your outdoor space for years to come.
Conclusion
Filling in a pond is a step-by-step process that requires careful planning and attention to detail. By following the steps outlined in this guide, you can create a beautiful and functional outdoor space that will be enjoyed for years to come. Remember to choose high-quality soil, plant suitable vegetation, and maintain the area regularly to ensure the success of your filled-in pond project.
Whether you are transforming an existing pond or starting from scratch, filling in a pond can be a rewarding project that adds value to your property and enhances your outdoor living experience.

