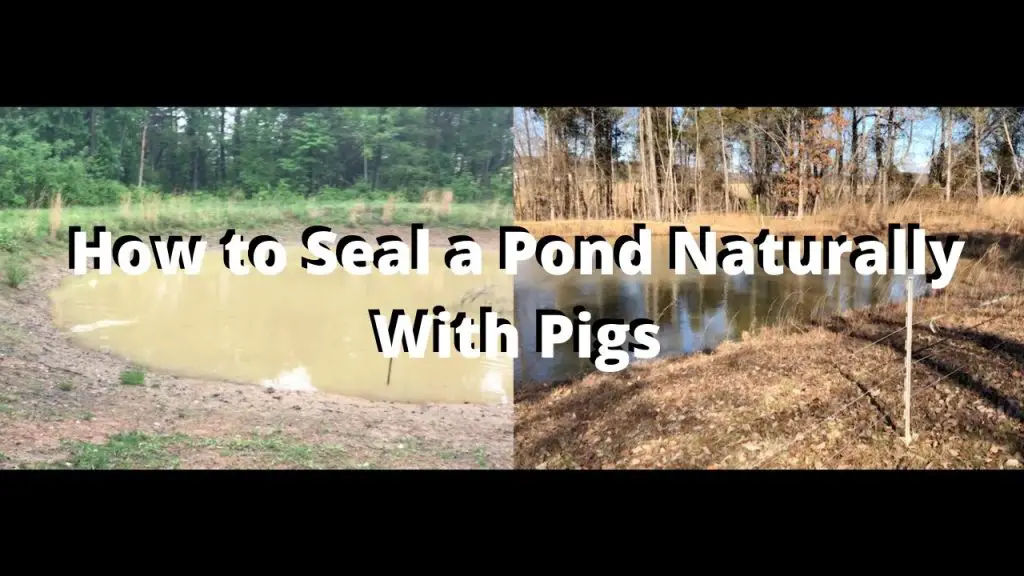
Sealing a pond is a crucial step in maintaining its water levels and preventing leaks. Whether you are creating a new pond or repairing an existing one, proper sealing is essential to ensure the longevity and functionality of your water feature. In this comprehensive guide, we will walk you through the steps and materials needed to effectively seal a pond.

Credit: m.youtube.com
Materials Needed:
- Pond Liner
- Underlayment
- Sealant (such as bentonite clay)
- Shovel
- Wheelbarrow
- Tape Measure
- Utility Knife
- Water Hose
- Level
Step 1: Planning and Preparation
Before you start the sealing process, it is essential to plan and prepare the area where the pond will be located. Choose a suitable location that receives adequate sunlight and is free from overhanging trees or roots that could puncture the pond liner.
Step 2: Excavation
Use a shovel to dig out the shape and depth of the pond according to your design. Make sure to create shelves or varying depths to accommodate different aquatic plants and wildlife.
Step 3: Installing the Underlayment
Place a protective underlayment over the excavated area to prevent punctures and tears in the pond liner. The underlayment acts as a cushion and provides an extra layer of protection.
Step 4: Pond Liner Placement
Unroll the pond liner over the underlayment, making sure it covers the entire pond area with some excess to allow for proper fitting. Smooth out any wrinkles or folds in the liner to ensure a tight seal.

Credit: www.fao.org
Step 5: Sealing the Pond
Once the liner is in place, it’s time to seal the pond. There are various methods of sealing a pond, with bentonite clay being a popular choice for its natural properties. Spread a layer of bentonite clay over the pond liner and wet it with a water hose to activate its sealing capabilities.
Step 6: Checking for Leaks
After sealing the pond, fill it with water and let it sit for a few days to check for any leaks. Monitor the water level closely to ensure that the pond is holding water effectively without any seepage.
Step 7: Adding Finishing Touches
Once you have confirmed that the pond is properly sealed and leak-free, you can add rocks, aquatic plants, and other decorative elements to enhance its appearance and create a natural habitat for fish and wildlife.
Regular Maintenance Tips:
- Monitor water levels regularly
- Remove debris and fallen leaves
- Inspect the pond liner for any damages
- Check the sealant periodically
- Keep aquatic plants trimmed
Benefits of a Well-Sealed Pond
Having a properly sealed pond offers numerous benefits, including:
- Preventing water loss
- Creating a healthy ecosystem for aquatic life
- Enhancing the aesthetic appeal of your property
- Reducing maintenance costs in the long run
- Minimizing the risk of contamination from external sources
By following these steps and guidelines, you can effectively seal your pond and enjoy a beautiful, functional water feature for years to come. Remember that proper maintenance is key to preserving the integrity of your pond and ensuring its longevity.