
Are you looking to add a stunning focal point to your garden? A cement pond can be a fantastic addition that not only enhances the aesthetic appeal of your outdoor space but also provides a tranquil oasis for relaxation. In this comprehensive guide, we will walk you through the step-by-step process of creating your very own cement pond.
Materials Needed:
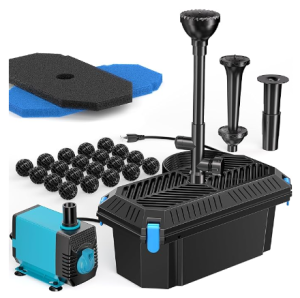
Here Is A Pond Setup Kits (DIY)
| Materials | Tools |
| Cement | Shovel |
| Sand | Trowel |
| Gravel | Level |
| Water | Wheelbarrow |
| Rebar | Measuring Tape |

Credit: www.motherearthnews.com
Step 1: Planning and Design
Start by deciding on the size and shape of your cement pond. Consider the available space in your garden and choose a location that receives adequate sunlight. Sketch out a design that includes the dimensions and any additional features such as a fountain or waterfall.
Step 2: Excavation
Using a shovel, dig out the area where your cement pond will be located. Make sure to create a hole that is slightly larger than the desired size of your pond to accommodate the cement walls. Remove any rocks, roots, or debris from the hole to ensure a smooth base.
Step 3: Creating the Foundation
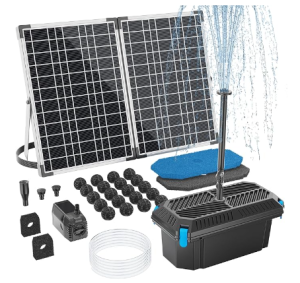
All In One Pond Setup Kits
Once the hole is dug, create a sturdy foundation for your cement pond by laying down a layer of gravel. This will help to support the weight of the cement walls and prevent shifting over time. Use a level to ensure that the foundation is even and well-compacted.
Credit: www.visuallandscapingadelaide.com.au
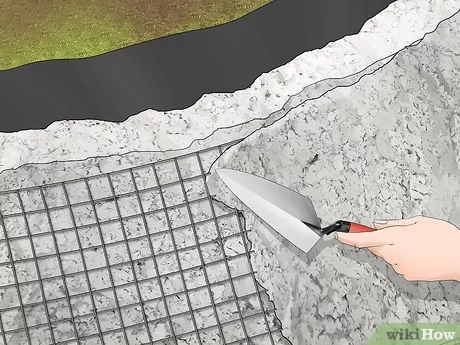
Step 4: Building the Walls
Now it’s time to mix your cement. In a wheelbarrow, combine cement, sand, and water to create a thick paste. Add rebar for reinforcement and start building the walls of your pond. Use a trowel to smooth out the cement and create a seamless finish.
Step 5: Adding the Finishing Touches
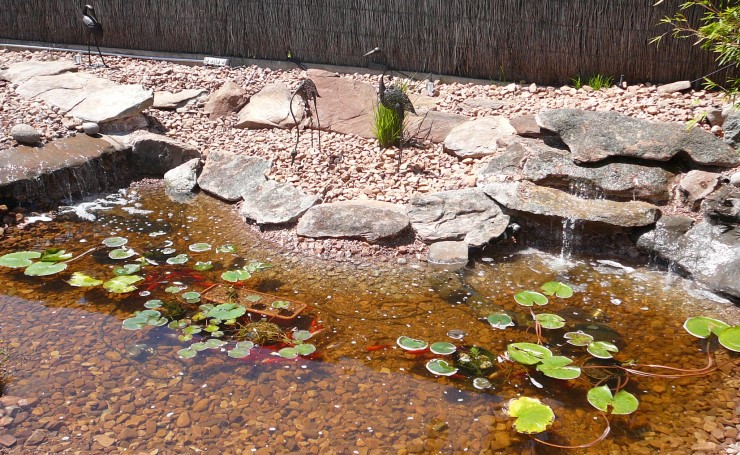
Once the cement walls are in place and have dried, fill your pond with water. Add aquatic plants, rocks, and other decorative elements to enhance the beauty of your pond. Consider installing a pump for a fountain or waterfall feature for added ambiance.
Step 6: Maintenance and Care
To keep your cement pond looking its best, make sure to regularly clean the water, remove any debris, and trim plants as needed. Check the pump and filtration system regularly to ensure proper functioning. During the winter months, consider draining the pond to prevent freezing.
Benefits of a Cement Pond
- Enhances the beauty of your garden
- Provides a peaceful and relaxing environment
- Supports aquatic plants and wildlife
- Adds value to your property
- Low maintenance compared to other water features
Creating a cement pond can be a rewarding DIY project that will bring joy and tranquility to your outdoor space. Follow these steps and enjoy the beauty of your very own water oasis right in your backyard!