Adding a waterfall to a small pond can enhance its beauty and create a tranquil oasis in your backyard. The sound of running water and the sight of cascading water can bring a sense of serenity to your outdoor space. In this guide, we will walk you through the steps to build a waterfall for a small pond.
1. Plan Your Waterfall Design
Before you start building your waterfall, it’s essential to plan out the design. Consider the size and shape of your pond, as well as the overall aesthetic you want to achieve. Decide on the location of the waterfall, keeping in mind factors such as sunlight exposure and accessibility for maintenance.
2. Gather Your Materials
For building a waterfall, you will need materials such as rocks, a pond liner, a submersible pump, tubing, and a spillway. Choose rocks of various sizes to create a natural-looking waterfall. Make sure to select materials that are suitable for outdoor use and can withstand exposure to water.
3. Dig the Pond and Waterfall Area
Start by digging the area where the waterfall will be located. Create a small reservoir at the top of the waterfall where the water will collect before cascading down. Dig a trench for the tubing that will connect the pump to the waterfall.
4. Install the Pond Liner
Once the pond and waterfall area are dug, install the pond liner to prevent water from seeping into the ground. Make sure the liner is securely in place and extends over the edges of the pond and waterfall area to create a watertight seal.
5. Arrange the Rocks
Now it’s time to arrange the rocks to create the waterfall. Start by placing larger rocks at the base of the waterfall and work your way up, using smaller rocks to fill in gaps. Be sure to stack the rocks securely to prevent shifting once the water is flowing.
6. Install the Pump and Tubing
Place the submersible pump in the reservoir at the top of the waterfall and connect it to the tubing. Run the tubing along the trench you dug earlier, making sure it is securely in place and free of kinks that could impede water flow.
7. Test the Waterfall
Fill the reservoir with water and turn on the pump to test the waterfall. Adjust the flow of water as needed to achieve the desired cascading effect. Check for any leaks or areas where water may be escaping and make necessary adjustments.

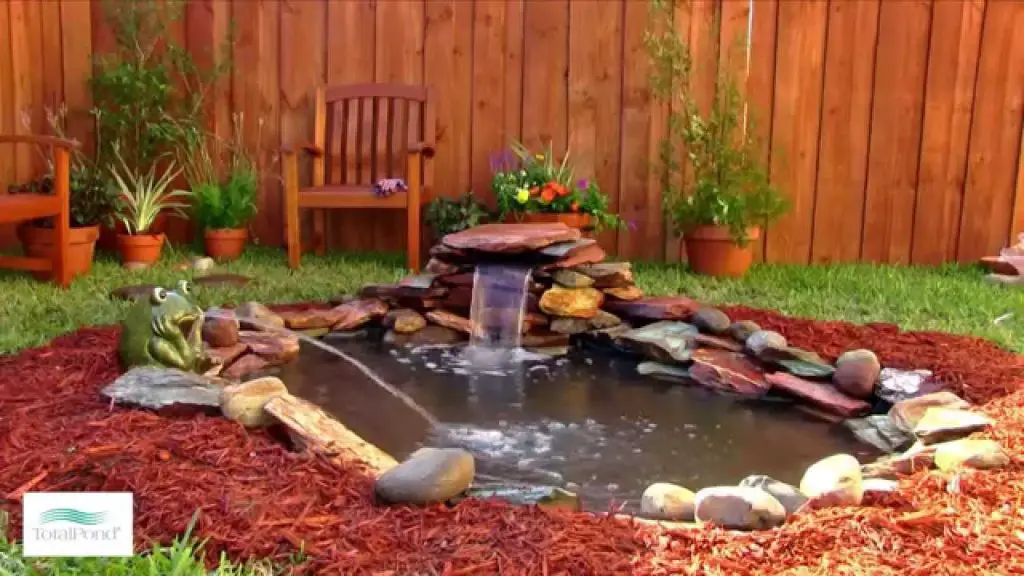
Credit: m.youtube.com
8. Add Plants and Lighting
Enhance the beauty of your waterfall by adding aquatic plants around the pond and waterfall area. Choose plants that thrive in water and will complement the natural look of the waterfall. Consider adding lighting to highlight the waterfall at night and create a magical ambiance.
9. Maintain Your Waterfall
Regular maintenance is essential to keep your waterfall running smoothly. Clean the pump and tubing regularly to prevent clogs and debris buildup. Trim plants as needed and check for any leaks or damage to the pond liner. Proper maintenance will ensure your waterfall remains a focal point of your outdoor space.
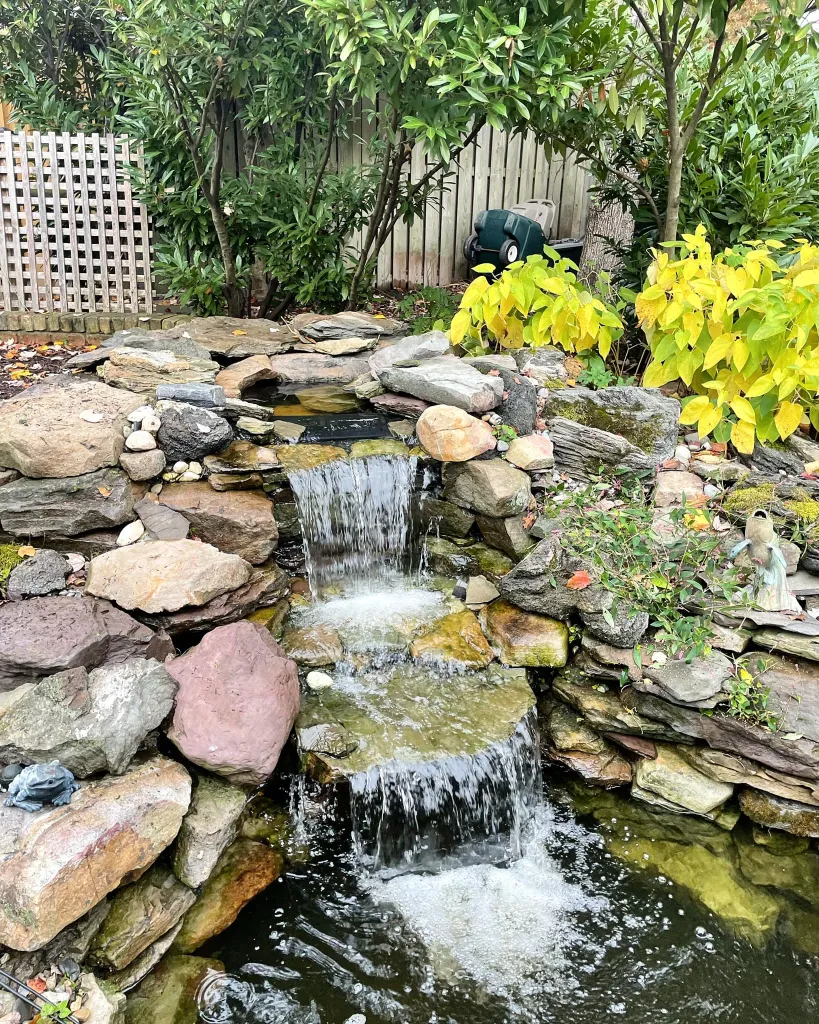
Credit: premierpond.com
Conclusion
Building a waterfall for a small pond can be a rewarding DIY project that adds beauty and tranquility to your outdoor space. By following these steps and using quality materials, you can create a stunning waterfall that enhances the ambiance of your backyard. So, roll up your sleeves, gather your materials, and get ready to enjoy the soothing sounds of your very own waterfall!