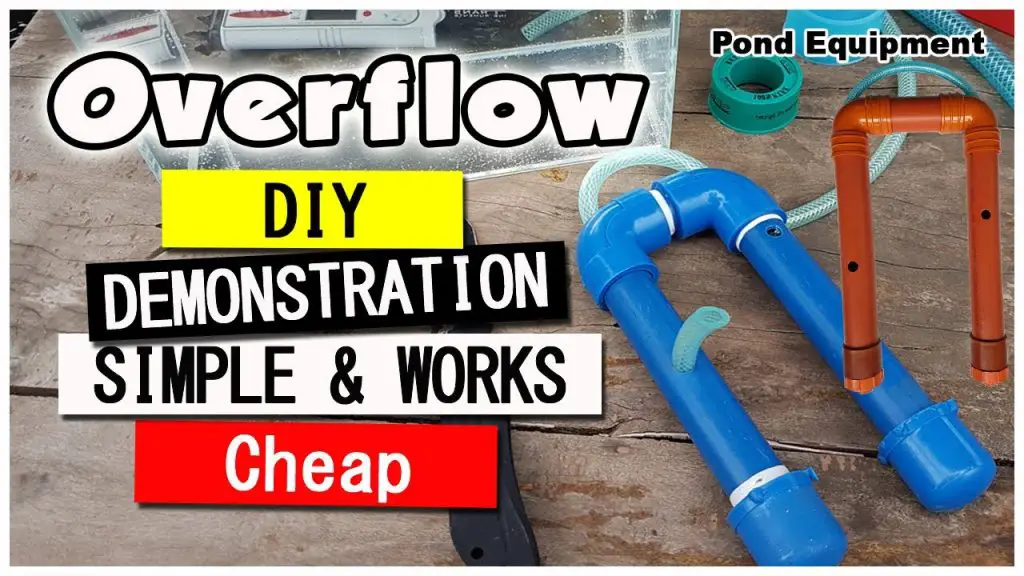
How to Build a Pond Overflow Pipe: A Step-by-Step Guide
Are you a pond owner looking to ensure proper water management and prevent overflow? One effective solution is to install a pond overflow pipe. In this comprehensive guide, we’ll walk you through the process of building a pond overflow pipe step by step. By following these instructions, you can maintain the water level in your pond and prevent potential flooding or water wastage.
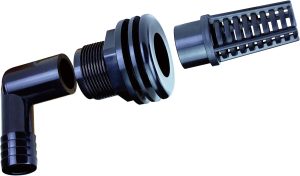
Affordable Solution For Increasing Pond Flow, Best-Rated
Understanding the Importance of a Pond Overflow Pipe
Before diving into the construction process, it’s crucial to understand the significance of a pond overflow pipe. Ponds, especially those located in areas with fluctuating water levels, require effective overflow management to prevent damage to the surrounding landscape and maintain a healthy aquatic environment. A well-designed pond overflow system ensures that excess water is safely redirected, thereby preventing erosion and potential flooding. By installing a pond overflow pipe, you can efficiently manage water levels and protect your pond from the adverse effects of excessive water accumulation.
Materials and Tools Needed
To build a pond overflow pipe, you’ll need the following materials and tools:
Materials:
– PVC pipe (appropriate diameter)
– PVC fittings (elbows, couplings, and connectors)
– PVC cement
– Pond liner
– Gravel
– Landscape fabric
– Silicone sealant
– Pipe hangers
– Screws
Tools:
– Measuring tape
– PVC pipe cutter or saw
– Drill with bits
– Utility knife
– Marker or pencil
– Level
– Shovel
Best Pond Overflow Kit In Your Budget
Step-by-Step Guide to Building a Pond Overflow Pipe
Now, let’s walk through the step-by-step process of constructing a pond overflow pipe:
Step 1: Determine the Pipe Location
Start by identifying the ideal location for the overflow pipe. Choose a spot where excess water can be safely discharged without causing erosion or flooding. The selected area should be easily accessible and allow for seamless water redirection.
Step 2: Measure and Cut the PVC Pipe
Using a measuring tape, determine the required length of the PVC pipe for the overflow system. Carefully mark the measurements on the pipe, and then use a PVC pipe cutter or saw to make precise cuts according to the marked dimensions.
Step 3: Assemble the PVC Fittings
Next, assemble the PVC fittings, such as elbows, couplings, and connectors, to create the desired configuration for the overflow pipe. Ensure that the fittings are securely attached to the PVC pipe, forming a continuous and watertight structure.
Step 4: Install the Overflow Pipe
Carefully position the assembled PVC pipe along the predetermined location for the overflow system. Use a level to ensure that the pipe is properly aligned and sloped to facilitate the smooth flow of excess water. Secure the pipe in place using pipe hangers and screws, providing adequate support to withstand the water pressure.
Step 5: Connect the Pipe to the Pond
Once the overflow pipe is securely installed, connect it to the pond by creating an opening in the pond liner. Use a utility knife to carefully cut a hole in the liner, ensuring that it corresponds to the diameter of the pipe. Insert the pipe through the hole, and then seal the edges with silicone to prevent water leakage.
Step 6: Backfill with Gravel
To stabilize the overflow pipe and promote proper drainage, backfill the surrounding area with gravel. The gravel will help distribute the water flow and prevent soil erosion around the pipe. Before adding the gravel, consider lining the excavated area with landscape fabric to further protect the soil.
Step 7: Test the Overflow System
Before completing the installation, it’s essential to test the functionality of the pond overflow pipe. Fill the pond to a level that triggers the overflow, and observe the water as it flows through the pipe. Check for any leaks or inefficiencies in the system, and make necessary adjustments to ensure optimal performance.
Step 8: Regular Maintenance
Once the pond overflow pipe is successfully installed, it’s important to establish a routine maintenance schedule. Periodically inspect the pipe and fittings for signs of wear or damage, and promptly address any issues to prevent potential malfunctions. Additionally, clear any debris or obstructions that may impede the flow of water through the overflow system.
Conclusion
By following this comprehensive guide, you can effectively build a pond overflow pipe to manage water levels and safeguard your pond from potential overflow. Proper installation and maintenance of an overflow system are essential for preserving the integrity of your pond and promoting a sustainable aquatic ecosystem. With the right materials, tools, and careful planning, you can successfully construct a reliable pond overflow pipe that contributes to the overall health and longevity of your pond.
In summary, building a pond overflow pipe involves careful planning, precise measurements, and proper installation techniques. By following this step-by-step guide, pond owners can ensure effective water management and prevent the adverse effects of pond overflow. Implementing a well-designed overflow system not only protects the surrounding environment but also contributes to the overall sustainability of the pond ecosystem.