Building a dock on a pond can provide a fantastic space for relaxation, fishing, and enjoying the beauty of nature. Whether you have a small backyard pond or a larger natural pond, constructing a dock can enhance your outdoor experience. In this article, we will guide you through the step-by-step process of building a dock on a pond.
Credit: deerhunterforum.com
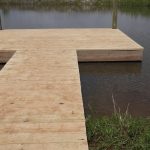
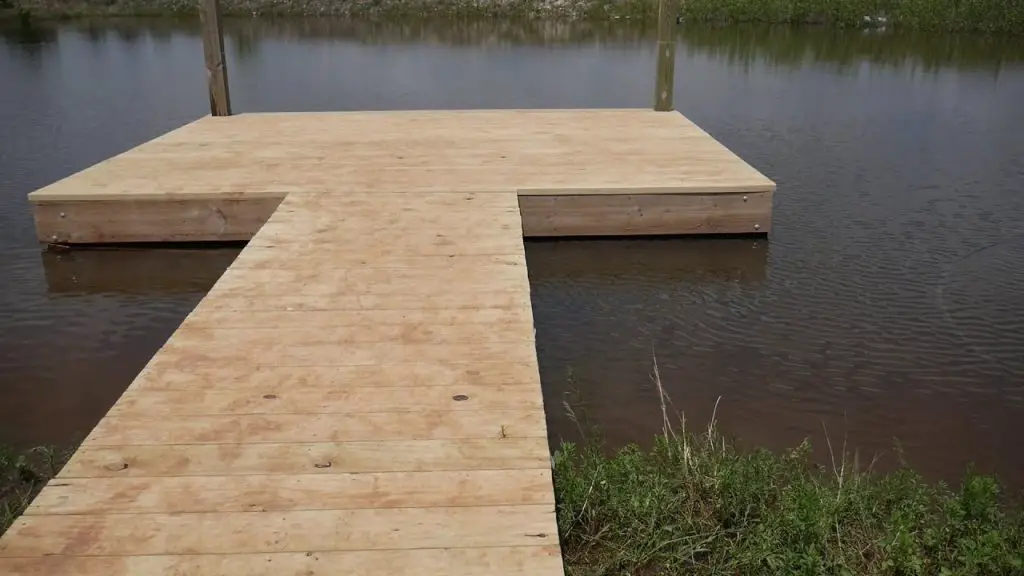
1. Determine the Dock Design
The first step in building a dock on a pond is to determine the design that best suits your needs. Consider the size of the pond, the purpose of the dock, and any local regulations or restrictions. Some popular dock designs include straight docks, T-shaped docks, and L-shaped docks. Choose a design that complements the surrounding environment and meets your requirements.

Credit: m.youtube.com
2. Gather Materials and Tools
Once you have decided on the dock design, gather all the necessary materials and tools. Common materials needed for building a dock include pressure-treated lumber, galvanized screws, joist hangers, concrete footings, and dock floats. Ensure that you have the right tools such as a circular saw, drill, measuring tape, level, and hammer.
3. Prepare the Site
Before starting the construction, prepare the site where the dock will be built. Clear any debris, vegetation, or rocks from the area. Ensure that the ground is leveled and stable. Mark the desired location of the dock using stakes or spray paint.
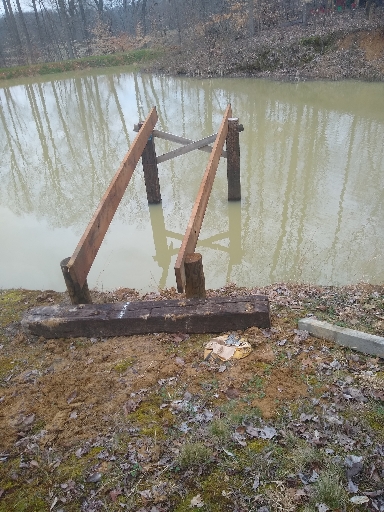
4. Install the Support Posts
The next step is to install the support posts for the dock. Dig holes at the marked locations and insert the support posts. Ensure that the posts are level and secure them in place with concrete footings. Allow the concrete to cure according to the manufacturer’s instructions.
5. Construct the Frame
Once the support posts are in place, it’s time to construct the frame of the dock. Start by attaching the joist hangers to the support posts. Cut the pressure-treated lumber to the desired lengths and attach them to the joist hangers. Use galvanized screws to secure the boards together.
6. Add the Decking and Railings
After constructing the frame, it’s time to add the decking and railings. Choose a durable decking material such as composite or pressure-treated wood. Install the decking boards perpendicular to the frame, leaving a small gap between each board for water drainage. Attach the railings to provide safety and support along the edges of the dock.
7. Install Dock Floats
If your pond has fluctuating water levels, it’s essential to install dock floats to keep the dock afloat. Attach the dock floats to the underside of the dock using galvanized screws. Make sure the floats are evenly distributed to provide stability.
8. Finishing Touches
Lastly, add the finishing touches to your dock. Sand the rough edges, and apply a weather-resistant stain or sealant to protect the wood from the elements. Consider adding benches, fishing rod holders, or a ladder to make your dock more functional and enjoyable.
Conclusion
Building a dock on a pond is a rewarding project that allows you to fully appreciate the beauty and tranquility of your outdoor space. By following the step-by-step guide outlined in this article, you can create a sturdy and functional dock that will provide endless hours of enjoyment. Remember to always check local regulations and obtain any necessary permits before starting the construction. Happy building!