Are you looking to improve the water quality in your pond and ensure the health of your aquatic life? One way to achieve this is by creating a DIY pond filter. Building your own pond filter can be a cost-effective and rewarding project that will help keep your pond water clean and clear. In this step-by-step guide, we will walk you through the process of making a simple yet effective pond filter.
Materials Needed:
To get started, gather the following materials:
- Large plastic container
- PVC pipe
- Pond filter media (such as filter foam or lava rocks)
- Pump
- Waterproof sealant
- Drill
- Utility knife
Step 1: Prepare the Container
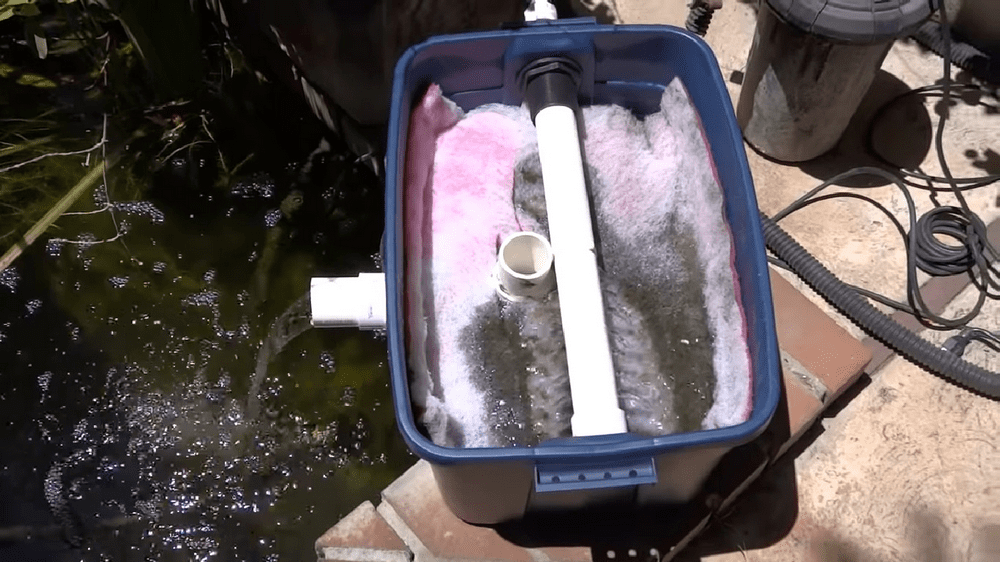
Begin by selecting a large plastic container that will serve as the main body of your pond filter. Make sure the container is big enough to hold the filter media and allow for water flow. Using a drill, create holes in the bottom of the container to allow water to pass through.
Step 2: Install the PVC Pipe
Next, cut a piece of PVC pipe to the desired height of the filter container. This pipe will serve as the outlet for the filtered water. Use a waterproof sealant to secure the PVC pipe in place at the bottom of the container.
Step 3: Add Filter Media
Fill the container with your chosen pond filter media, such as filter foam or lava rocks. The filter media will trap debris and help remove impurities from the water as it passes through the filter.
Credit: gardens.theownerbuildernetwork.co
Step 4: Connect the Pump
Attach a pump to the PVC pipe inside the container. The pump will help circulate the water through the filter, ensuring that it stays clean and oxygenated for your pond inhabitants.
Step 5: Seal the Container
Once the pump is in place, seal the container with a lid or cover to prevent debris from entering the filter. Make sure the lid is secure but can be easily removed for maintenance.
Step 6: Test the Filter
Before placing the DIY pond filter in your pond, test it to ensure it is working correctly. Fill the container with water and turn on the pump to check the water flow and filtration efficiency.
Step 7: Install the Filter in Your Pond
Once you have confirmed that the filter is functioning properly, install it in your pond. Place the filter in an area with good water circulation to maximize its effectiveness.
Maintaining Your DIY Pond Filter
Regular maintenance is key to keeping your DIY pond filter in top condition. Here are some tips for maintaining your filter:
- Check the filter media regularly and clean or replace it as needed.
- Inspect the pump to ensure it is working correctly and clean any debris that may be blocking the pump intake.
- Monitor the water flow through the filter and adjust the pump as necessary to maintain optimal filtration.
- Perform routine checks on the filter components to identify any leaks or damage that may affect its performance.
Benefits of a DIY Pond Filter
Creating your own pond filter offers several benefits, including:
- Cost savings compared to purchasing a commercial pond filter.
- Customization options to suit your pond’s specific needs and size.
- Enhanced water quality for healthier aquatic life in your pond.
- A rewarding DIY project that can improve your pond maintenance skills.

Credit: www.wikihow.com
Conclusion
Building a DIY pond filter is a rewarding project that can greatly benefit the health and appearance of your pond. By following this step-by-step guide and investing time in maintenance, you can enjoy clean and clear pond water while providing a healthy environment for your aquatic inhabitants. Get started on creating your DIY pond filter today and take your pond maintenance to the next level!