Adding a small pond to your garden or backyard can transform the space into a serene oasis where you can relax and enjoy the beauty of nature. Whether you want to attract wildlife, create a peaceful retreat, or simply enhance the aesthetics of your outdoor space, building a small pond can be a rewarding and relatively simple project. In this guide, we will walk you through the steps to create your own small pond.
Step 1: Planning and Design
Before you start digging, take some time to plan and design your small pond. Consider the size and shape of the pond, its location in your yard, and the overall look you want to achieve. Think about whether you want to include water plants, fish, or other aquatic life in your pond.
Key Considerations:
- Choose a location with access to sunlight for at least half of the day.
- Determine the size of the pond based on the available space and your preferences.
- Decide on the shape of the pond, whether it’s round, oval, or custom-designed.
- Consider adding rocks, waterfalls, or fountains to enhance the visual appeal.
Step 2: Digging the Pond
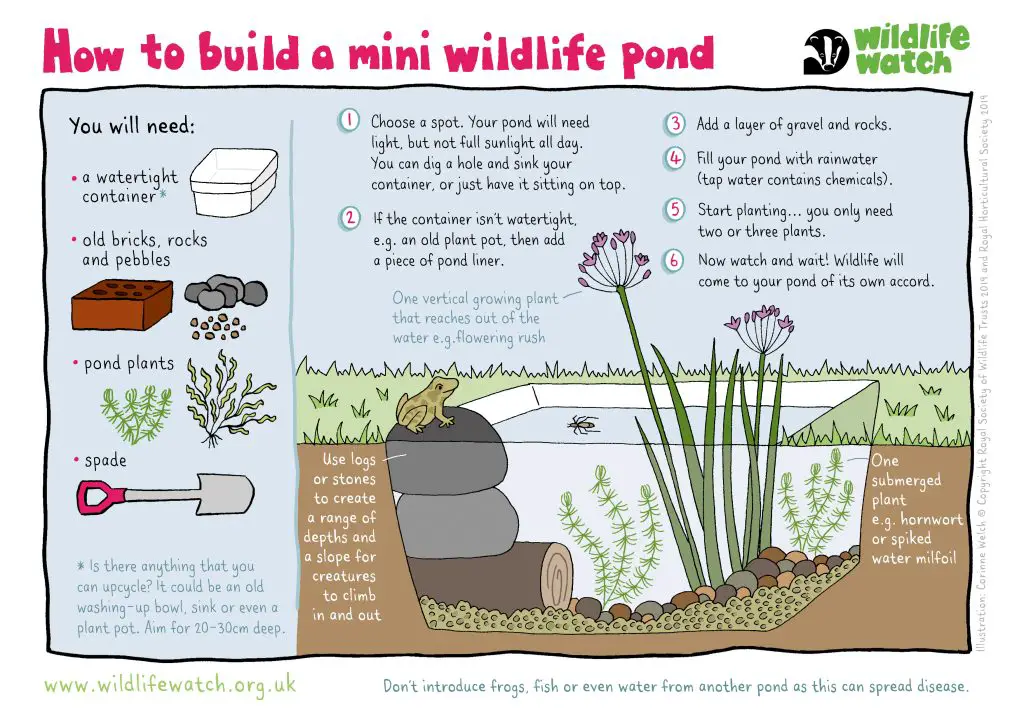
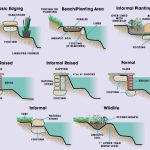
Once you have finalized your pond design, it’s time to start digging. Use a rope or hose to outline the shape of the pond on the ground. Start digging within the outline, making sure to create shelves of varying depths to accommodate different types of aquatic plants and creatures.
Digging Tips:
- Use a spade or shovel to dig the pond, removing rocks and roots as you go.
- Create a shallow area for plants and a deeper area for fish if desired.
- Ensure the edges of the pond are gently sloped to allow easy access for wildlife.
Step 3: Lining the Pond
After digging the pond, it’s essential to line it to prevent water leakage. You can use a flexible pond liner made of rubber or PVC to create a watertight barrier. Carefully place the liner inside the hole, making sure it covers all the surfaces and edges of the pond.
Liner Installation:
- Smooth out any wrinkles or folds in the liner to ensure a snug fit.
- Add a layer of sand or old carpet underneath the liner to protect it from sharp objects.
- Trim any excess liner around the edges of the pond for a neat finish.

Credit: m.youtube.com
Step 4: Adding Water and Accessories
Once the pond is lined, it’s time to fill it with water. Use a garden hose to fill the pond slowly, allowing the water to settle and the liner to conform to the shape of the pond. You can also add rocks, pebbles, and aquatic plants to enhance the natural look of the pond.
Enhancements:
- Install a small pump or fountain to keep the water circulating and prevent stagnation.
- Add water lilies, lotus plants, or other aquatic vegetation to provide shade and habitat for fish.
- Introduce fish such as goldfish or koi to add movement and life to the pond.
Step 5: Maintenance and Care
Once your small pond is complete, it’s important to maintain it regularly to keep it healthy and thriving. Remove debris, fallen leaves, and algae from the surface of the water. Trim and prune aquatic plants as needed, and check the water quality regularly to ensure a balanced ecosystem.
Maintenance Tips:
- Use a pond skimmer or net to remove leaves and debris from the water surface.
- Monitor the water quality using a test kit and adjust as needed with additives or treatments.
- Clean the pump and filter regularly to ensure proper circulation and filtration.
Credit: www.wildlifetrusts.org
Final Thoughts
Creating a small pond in your garden can bring a sense of tranquility and beauty to your outdoor space. Whether you enjoy watching fish swim lazily, listening to the soothing sound of a waterfall, or simply basking in the natural beauty of aquatic plants, a small pond can be a wonderful addition to your landscape.
By following these steps and incorporating your own creativity and personal touch, you can design and build a small pond that reflects your style and enhances the overall ambiance of your outdoor sanctuary.
So, roll up your sleeves, grab your shovel, and start creating your own tranquil oasis with a small pond today!


