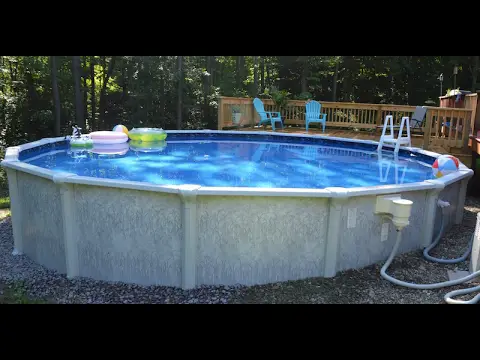
To install an above ground pool, first mark the desired location and ensure it is level. Then, assemble the pool frame, connect the liner, and fill the pool with water.
Are you ready to beat the summer heat and enjoy a refreshing dip in your very own above ground pool? Installing an above ground pool is easier than you think. In this guide, we will walk you through the step-by-step process of installing an above ground pool in your backyard.
From marking the location to filling it up with water, we’ve got you covered. So, grab your tools and let’s get started on creating your own private oasis in no time!

Credit: m.youtube.com
Choosing The Right Location
The first step in installing an above-ground pool is selecting the right location. It’s crucial to carefully assess the space to ensure it meets all necessary requirements and provides a safe and functional environment for your pool.
Considerations For Location Selection
When choosing the location for your above-ground pool, there are several important considerations to keep in mind:
- Sunlight: Ensure the location receives ample sunlight throughout the day to help maintain water temperature and prevent excessive shading.
- Level Ground: Select a spot with a flat and level surface to prevent any structural issues and ensure proper water circulation.
- Proximity to Utilities: It’s essential to have easy access to water and electrical sources for filling and maintaining the pool.
- Landscaping and Obstructions: Avoid placing the pool near trees, shrubs, or overhead utility lines to prevent debris, falling leaves, and potential damage.
Preparing The Site
Once you have determined the ideal location, the next step is to prepare the site for installation:
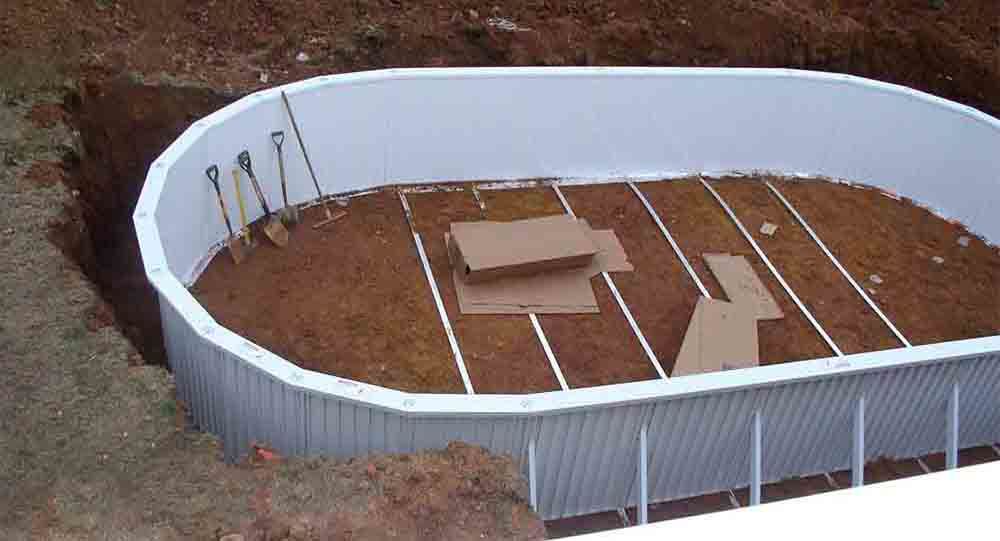
- Clear the Area: Remove any debris, rocks, and vegetation from the ground to create a clean and clear foundation for the pool.
- Measure and Mark: Use marking tools to outline the exact dimensions of the pool’s placement, ensuring accuracy and proper alignment.
- Level the Ground: If the chosen area is slightly uneven, consider leveling the ground using sand, compacted dirt, or a leveling tool for stability.
- Check for Drainage: Verify that the location allows for proper drainage to avoid water accumulation around the pool area.
Gathering Necessary Tools And Materials
Gathering the necessary tools and materials is the first step towards a successful installation of an above-ground pool. Having the right equipment and supplies at hand will streamline the process and ensure a smooth setup. Here’s a breakdown of the essential tools and materials required for this project:
Tools Required For Installation
- Measuring tape
- Level
- Screwdriver set
- Adjustable wrench
- Rubber mallet
- Trowel
- Hacksaw
- Drill with screw bits
- Utility knife
- Wheelbarrow for mixing concrete
Materials Needed For The Project
- Above-ground pool kit
- Plywood or sand for base
- Pool liner
- Concrete mix
- Sand for base adjustment
- Chemicals for water treatment
- Water supply hose
- Ladder
- Filter system
- Pool cover
Preparing The Ground
Leveling The Ground
1. Measure and mark the area for the above ground pool accurately.
Adding A Base Material
1. Lay a layer of geotextile fabric to prevent weeds and promote drainage.
2. Spread a layer of sand or pool pad evenly for a smooth base.
3. Compact the base material using a tamper to ensure stability.
4. Verify the ground is level using a spirit level for proper pool installation.
Assembling The Pool Walls
Assembling the pool walls is a crucial step to ensure a sturdy and secure above ground pool. This process involves organizing the parts and following the manufacturer’s instructions. By paying attention to detail and carefully following the steps, you can smoothly complete this stage of the installation.
Organizing The Parts
Before you begin assembling the pool walls, it’s essential to organize the parts effectively. This will help you stay organized and avoid unnecessary confusion during the installation process. Take a few minutes to sort and arrange all the components, such as the uprights, top rails, bottom rails, and wall sections.
Here’s a table illustrating how you can organize these parts:
| Parts | Quantity |
|---|---|
| Uprights | 12 |
| Top Rails | Top rail someone |
| Bottom Rails | Bottom rail someone |
| Wall Sections | Wall section someone |
Arrange the parts in a clear and easily accessible area, ensuring you have all the necessary components for the assembly process.
Following The Manufacturer’s Instructions
Once you have organized the parts, it’s time to follow the manufacturer’s instructions. Every pool model may have specific guidelines for assembling the walls. These instructions will provide you with the necessary steps to ensure proper alignment and stability of the pool structure.
Remember to consult the instruction manual or any additional documentation provided by the manufacturer. Pay close attention to any warnings or safety precautions mentioned. By adhering to these instructions, you can avoid potential errors and ensure the walls are assembled correctly.
It’s especially important to follow the manufacturer’s instructions when it comes to joining the wall sections and attaching the rails and uprights. These steps have a direct impact on the structural integrity of the pool, so following the guidelines precisely is crucial.
Take your time and be patient throughout the process. Your diligence will pay off as you witness the solid construction of your above ground pool.
Installing The Pool Liner
Checking For Debris
Before placing the liner, ensure the pool floor is free from any debris.
Securing The Liner Properly
Smooth out the liner carefully to avoid creases and wrinkles.
Adding Water And Finishing Touches
To complete your above ground pool installation, simply fill the pool with water and add the finishing touches. This final step ensures that your pool is ready for use, allowing you to enjoy cooling off during hot summer days.
Filling The Pool
Adding Chemicals And Testing Water Quality
Maintenance And Safety Tips
When it comes to maintaining an above ground pool, there are essential practices to uphold for both pool upkeep and safety. By following regular maintenance practices and ensuring pool safety measures, you can keep your pool in top condition while providing a safe environment for swimmers. Here are some tips to help you maintain and keep your above ground pool safe.
Regular Maintenance Practices
Regular maintenance is crucial to keeping your above ground pool functioning optimally. By implementing the following practices, you can ensure the longevity of your pool and the cleanliness of the water:
- Clean the pool filter and skimmer regularly
- Check and maintain the pH and chlorine levels
- Remove debris from the pool surface and bottom
- Inspect the pool structure for any signs of wear or damage
- Keep the pool water at the appropriate level
Ensuring Pool Safety Measures
When it comes to pool safety, there are essential measures that should be in place to prevent accidents and ensure a secure pool environment:
- Install a secure fence around the pool area
- Use a pool cover when the pool is not in use
- Prohibit diving in shallow areas
- Enforce strict adult supervision for children swimming
- Keep safety equipment readily accessible

Credit: poolservicema.com

Credit: www.yescontractorsnj.com
Conclusion
Installing an above ground pool is a manageable project with the right tools and guidance. By following the step-by-step instructions outlined in this blog post, you can create a relaxing and enjoyable space for your family and friends to make lasting memories.
Enjoy your new pool!


