Welcome to our comprehensive guide on how to install a pond liner! Building a pond in your garden can add a touch of tranquility and beauty to your outdoor space. Pond liners are an essential component of any pond construction project as they help to retain water and create a barrier between the soil and the water in the pond.
Materials Needed
Before you begin the installation process, make sure you have all the necessary materials on hand:
- Pond liner
- Underlay
- Sharp knife or scissors
- Measuring tape
- Marker
- Sand or soft padding material
- Rocks or stones (optional)
- Water pump and filter (optional)
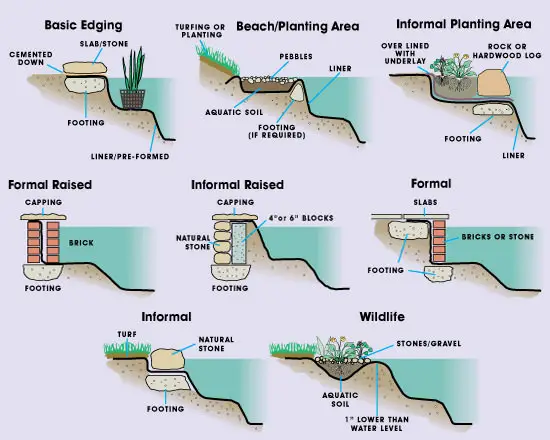
Step 1: Prepare the Pond Area
Start by selecting a suitable location for your pond. Ensure the area is level and free from any sharp objects that could puncture the liner. Clear the area of any debris, rocks, or roots that could damage the liner.

Credit: www.btlliners.com
Step 2: Measure and Mark the Pond Area
Using a measuring tape, determine the dimensions of your pond. Mark the outline of the pond using a marker or spray paint. This will serve as a guide for the placement of the pond liner.
Step 3: Prepare the Pond Liner
Unroll the pond liner in a sunny area for a few hours to allow it to relax and become more pliable. This will make it easier to work with during installation. Trim any excess material using a sharp knife or scissors.
Step 4: Add Underlay
Place a layer of underlay material, such as sand or soft padding, on the bottom of the pond area. This will help protect the liner from punctures and provide cushioning for the pond floor.
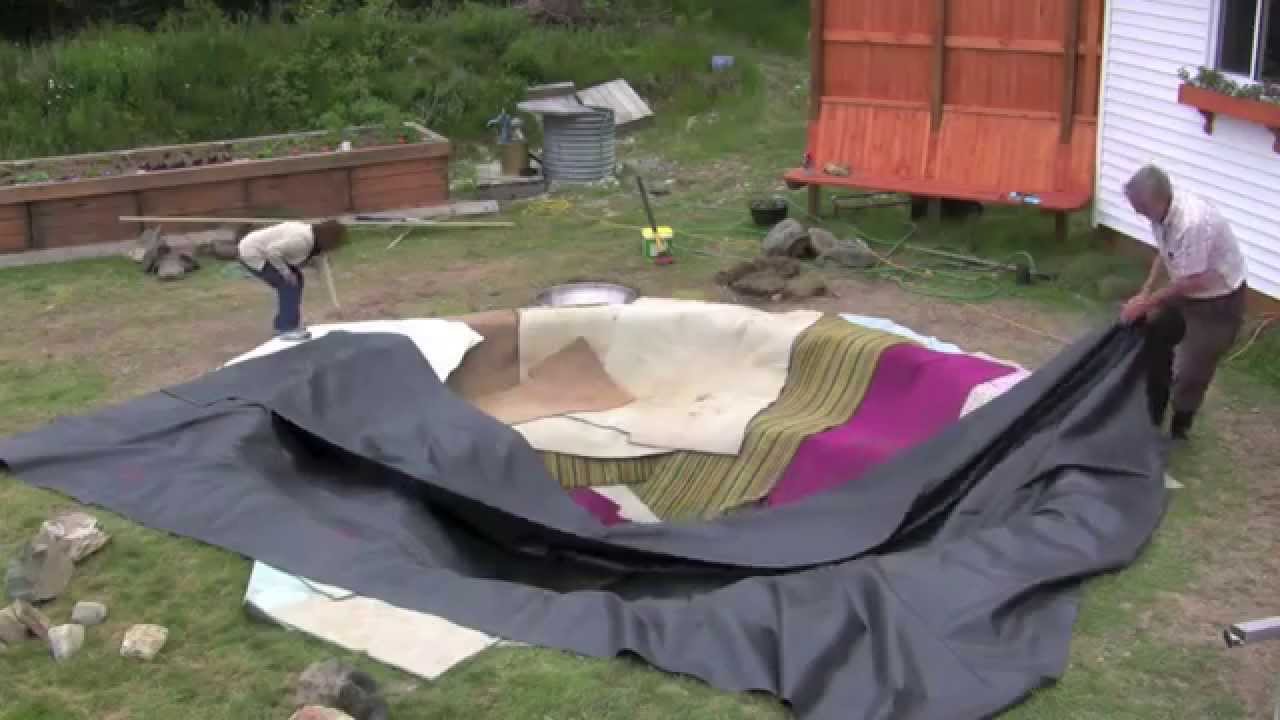
Credit: www.youtube.com
Step 5: Install the Pond Liner
Carefully position the pond liner inside the marked outline, ensuring it is centered and free from wrinkles or folds. Gently press the liner into place, smoothing out any creases as you go.
Step 6: Secure the Liner
Secure the edges of the pond liner by placing rocks or stones around the perimeter. This will help hold the liner in place and prevent it from shifting. Make sure the liner is taut but not stretched too tightly.
Step 7: Fill the Pond
Once the liner is securely in place, it’s time to fill the pond with water. Start by adding a few inches of water to the bottom of the pond and check for any leaks. If no leaks are found, continue filling the pond to the desired level.
Step 8: Add Finishing Touches
With the pond filled, you can now add any additional features such as water plants, fish, or a water pump and filter. These elements will help create a thriving ecosystem within your pond.
Step 9: Enjoy Your Pond
Now that your pond liner is installed and your pond is complete, take some time to sit back, relax, and enjoy the beauty of your new outdoor oasis. Watching the fish swim and listening to the soothing sound of running water can be a peaceful and rewarding experience.
By following these simple steps, you can successfully install a pond liner and create a stunning water feature in your garden. Remember to regularly maintain your pond by removing debris, checking the water quality, and ensuring the pump and filter are working properly.
Whether you’re a seasoned DIY enthusiast or a beginner looking to spruce up your outdoor space, installing a pond liner is a rewarding project that can bring years of enjoyment. So, grab your tools and get started on creating your own backyard oasis!