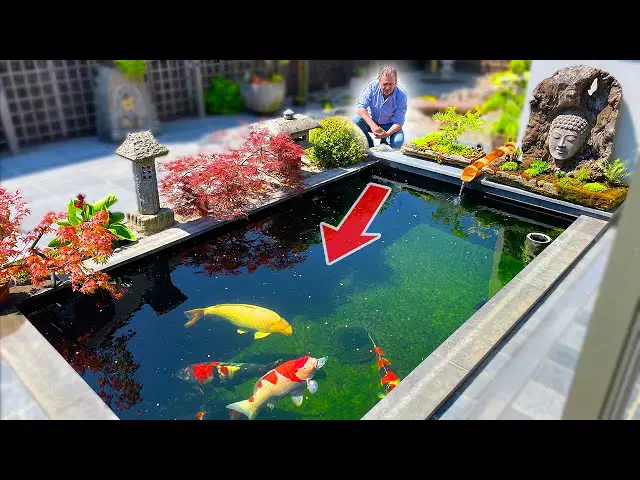
Credit: www.youtube.com
:max_bytes(150000):strip_icc()/KoiPond-5fe8b3a605ef4743a55dba059cfb531b.jpg)
Credit: www.thespruce.com
Step 1: Planning and Design
Before you start digging, it’s important to carefully plan and design your koi fish pond. Consider the size and location of your pond, taking into account factors such as sunlight exposure, proximity to trees, and the overall layout of your outdoor space. Keep in mind that koi fish require a certain amount of space to thrive, so be sure to choose a size that will comfortably accommodate them.Key Considerations:
- Size and shape of the pond
- Depth of the pond
- Location and surroundings
- Water circulation and filtration
Step 2: Digging the Pond
Once you’ve finalized the design, it’s time to start digging. Use a rope or hose to outline the shape of your pond, and then carefully excavate the area. The depth of your pond will depend on the climate in your region and the size of your koi fish. In general, a depth of at least 3 feet is recommended to provide adequate space for the fish to swim and thrive.Pro Tips:
- Use a level to ensure uniform depth
- Consider the slope for easy access and maintenance
- Remove any sharp objects or debris from the bottom
Step 3: Installing the Pond Liner
To prevent water from seeping into the surrounding soil, you’ll need to install a durable pond liner. Choose a high-quality liner that is specifically designed for ponds and water features. Carefully lay the liner in the excavated area, ensuring that it overlaps the edges of the pond. Smooth out any wrinkles or folds to create a snug fit.Recommended Materials:
- EPDM rubber liner
- PVC liner
- Flexible preformed liners
Step 4: Adding Filtration and Water Circulation Systems
Proper filtration and water circulation are essential for maintaining a healthy and balanced environment for your koi fish. Install a reliable filtration system to remove debris and waste from the water, and consider adding a pump to ensure adequate circulation and oxygenation. Additionally, you may want to incorporate a biological filter to promote the growth of beneficial bacteria.Essential Components:
- Submersible pump
- UV clarifier
- Biological filter media
- Aeration system
Step 5: Adding Rocks, Gravel, and Plants
Enhance the natural beauty of your koi fish pond by incorporating rocks, gravel, and aquatic plants. Arrange rocks around the perimeter of the pond to create a visually appealing border, and add a layer of gravel to the bottom to provide a natural substrate for beneficial bacteria. Consider planting water lilies, lotus, and other aquatic plants to provide shade and shelter for your koi fish.Recommended Plants:
- Water lilies
- Lotus
- Water hyacinth
- Hornwort
Step 6: Introducing the Koi Fish
With the pond fully prepared, it’s time to introduce your koi fish to their new home. Carefully acclimate the fish to the water temperature by floating their transport bag in the pond for about 15-20 minutes. Once the temperature has equalized, gently release the fish into the pond. Keep a close eye on them in the first few days to ensure they are adjusting well to their new environment.Key Considerations:
- Monitor water temperature and quality
- Observe fish behavior and appetite
- Provide adequate shelter and hiding spots
Step 7: Maintenance and Care
Maintaining a healthy and thriving koi fish pond requires regular care and attention. Be sure to monitor water quality parameters such as pH, ammonia, and nitrite levels, and perform routine water changes as needed. Keep an eye out for signs of disease or distress in your koi fish, and address any issues promptly to ensure their well-being.Recommended Practices:
- Perform weekly water tests
- Remove debris and excess algae
- Prune and maintain aquatic plants
- Feed the fish a balanced diet


