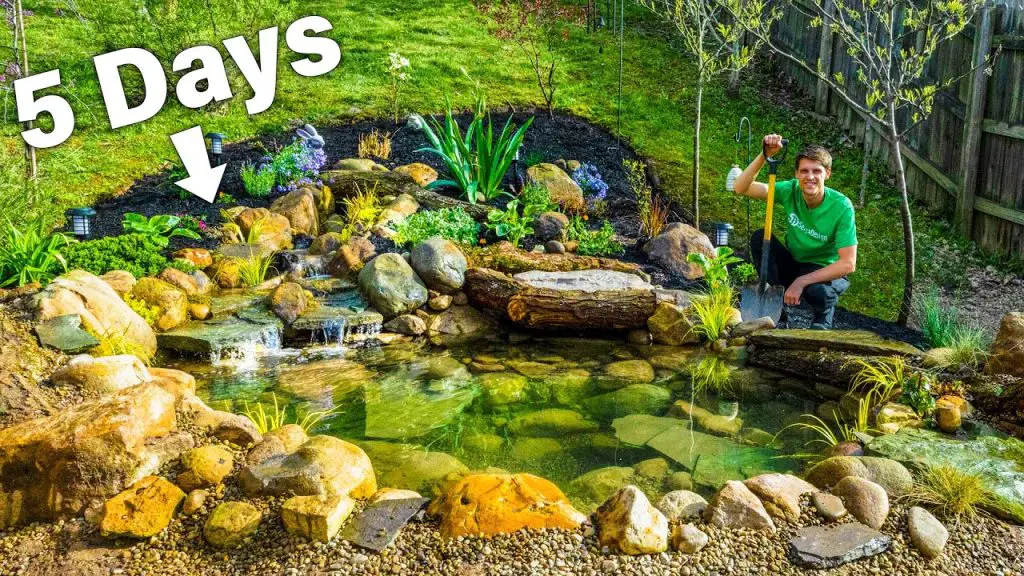
Are you looking to transform your backyard into a serene oasis? Building a pond can be a fantastic way to add a touch of nature to your outdoor space. In this guide, we’ll walk you through the step-by-step process of creating your very own DIY pond, from planning and design to construction and maintenance.
Planning Your DIY Pond
Before you start digging, it’s important to carefully plan the location and design of your pond. Consider factors such as the size of your yard, the amount of sunlight the area receives, and any potential obstacles such as tree roots or underground utilities. Sketch out a rough design of your pond, including its shape, depth, and any additional features such as waterfalls or fountains.
Choosing The Right Location
When selecting a location for your pond, aim to place it in an area that receives a good balance of sunlight and shade. Too much sun can encourage algae growth, while too much shade can inhibit the growth of aquatic plants. Additionally, avoid placing the pond directly under trees to minimize the amount of leaves and debris that fall into the water.
Gathering Materials
Before you begin construction, gather all the necessary materials and tools. You’ll need items such as a pond liner, a pump and filter system, rocks or boulders for edging, aquatic plants, and possibly fish. Make a checklist of everything you’ll need to avoid multiple trips to the hardware store.

Credit: www.thisoldhouse.com
Excavation and Pond Construction
Once you’ve finalized your design and gathered your materials, it’s time to start digging. Use a garden hose or spray paint to outline the shape of your pond on the ground. Then, begin excavating the area, making sure to create shelves or varying depths to accommodate different types of aquatic plants and wildlife.
Installing The Pond Liner
After excavating the pond, carefully lay the pond liner across the hole, ensuring that it extends up and over the edges. Smooth out any wrinkles or folds, and secure the liner in place using rocks or bricks. Trim off any excess liner, leaving a few extra feet around the edges to allow for settling and adjustment.
Adding The Pump And Filtration System
Next, install the pump and filtration system to keep the water clean and circulating. Position the pump at the bottom of the pond and connect it to the filter, which can be placed at the edge of the pond or hidden among rocks. Be sure to follow the manufacturer’s instructions for proper installation and maintenance of the pump and filter.

Credit: www.thegardenglove.com
Enhancing Your Pond with Landscaping
With the basic structure of your pond in place, it’s time to add the finishing touches. Surround the edges of the pond with rocks, boulders, and gravel to create a natural-looking border. Plant aquatic vegetation around the pond to provide shade, shelter, and oxygen for any fish or wildlife that may inhabit the water.
Adding Water Features
If you’d like to incorporate water features such as a waterfall or fountain, now is the time to install them. Many DIY pond kits come with pre-formed waterfall elements that can be easily integrated into your design. Position rocks and stones to create a cascading effect, and connect the water feature to the pump to ensure a continuous flow of water.
Introducing Aquatic Life
If you’re interested in adding fish to your pond, carefully introduce them once the pond has been established for a few weeks. Koi, goldfish, and other species can bring life and movement to your pond, but be sure to research the specific care requirements for each type of fish to ensure they thrive in their new environment.
Maintaining Your DIY Pond
Once your pond is up and running, it’s important to stay on top of maintenance to keep it looking its best. Regularly clean the pump and filter, remove any debris that accumulates on the surface, and trim back overgrown plants to prevent them from taking over the pond.
Seasonal Care
As the seasons change, your pond will require different levels of care. In the spring, be on the lookout for algae blooms and adjust the pump and filter settings as needed. In the summer, keep an eye on water levels and provide shade for fish and plants during hot weather. In the fall, remove any fallen leaves and prepare the pond for winter by installing a pond heater or de-icer to prevent freezing.
Enjoying Your Backyard Oasis
With your DIY pond complete, it’s time to sit back, relax, and enjoy the tranquil beauty of your backyard oasis. Whether you’re watching fish swim lazily through the water, listening to the soothing sounds of a waterfall, or simply admiring the reflection of the surrounding landscape, your pond is sure to become a favorite feature of your outdoor space.
Conclusion
Building a DIY pond is a rewarding project that can enhance the beauty and tranquility of your outdoor environment. By carefully planning and constructing your pond, as well as maintaining it throughout the seasons, you can create a stunning water feature that brings joy and relaxation to your home for years to come.
Are you ready to roll up your sleeves and start building your own backyard oasis? With the right tools, materials, and a bit of creativity, you can create a stunning pond that adds a touch of natural beauty to your outdoor space.


