Are you planning to backfill your pool but not sure where to start? Backfilling a pool is an essential step in the pool removal process, and it’s crucial to do it correctly to avoid any issues in the future. In this guide, we will walk you through the steps to backfill a pool properly.
Step 1: Drain the Pool
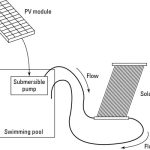
The first step in backfilling a pool is to drain all the water from it. You can use a submersible pump to remove the water efficiently. Make sure to drain the water in a way that it doesn’t cause any damage to the surrounding area.
Credit: tucsonpoolbuilders.com
Step 2: Demolition of the Pool
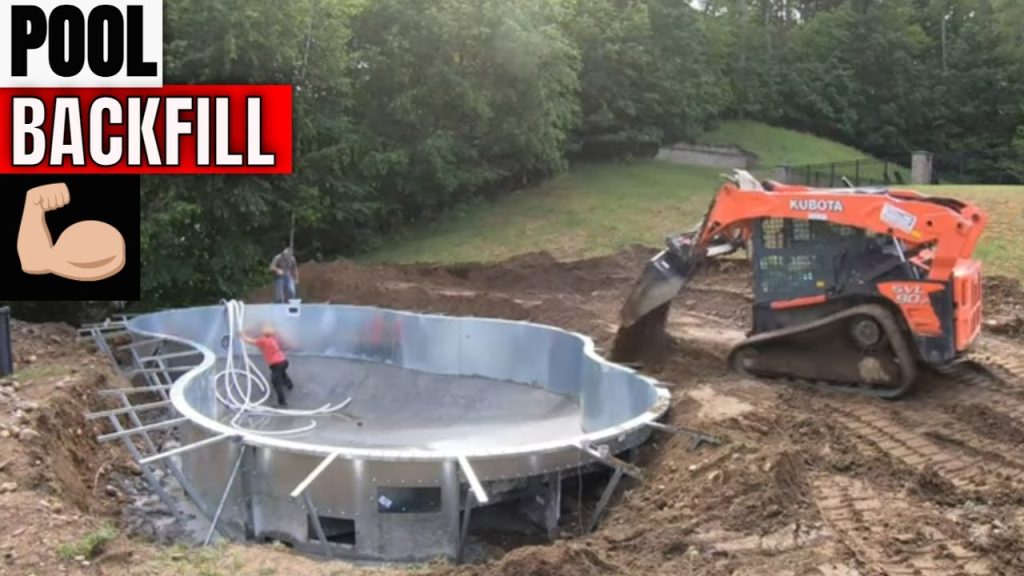
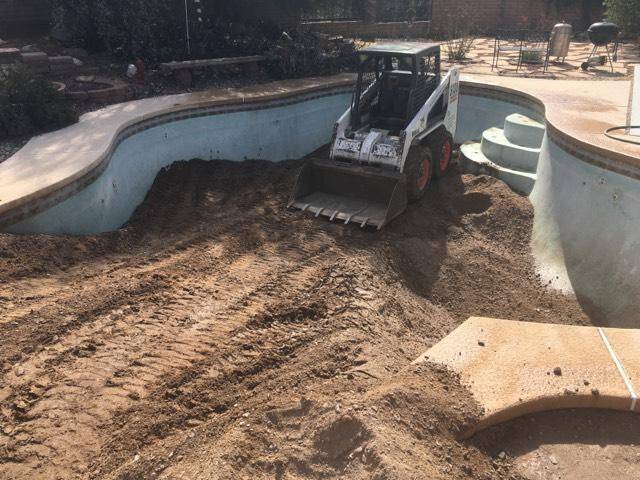
Before backfilling the pool, you need to demolish the existing structure. This involves breaking up the pool’s walls and floor to prepare it for backfilling. You can use heavy machinery or hand tools for this step, depending on the size of the pool.
Step 3: Remove Pool Debris
Once the pool is demolished, you need to remove all the debris and rubble from the site. This will ensure a clean surface for the backfill material and prevent any potential hazards during the backfilling process.
Credit: www.superiorgroundcover.com
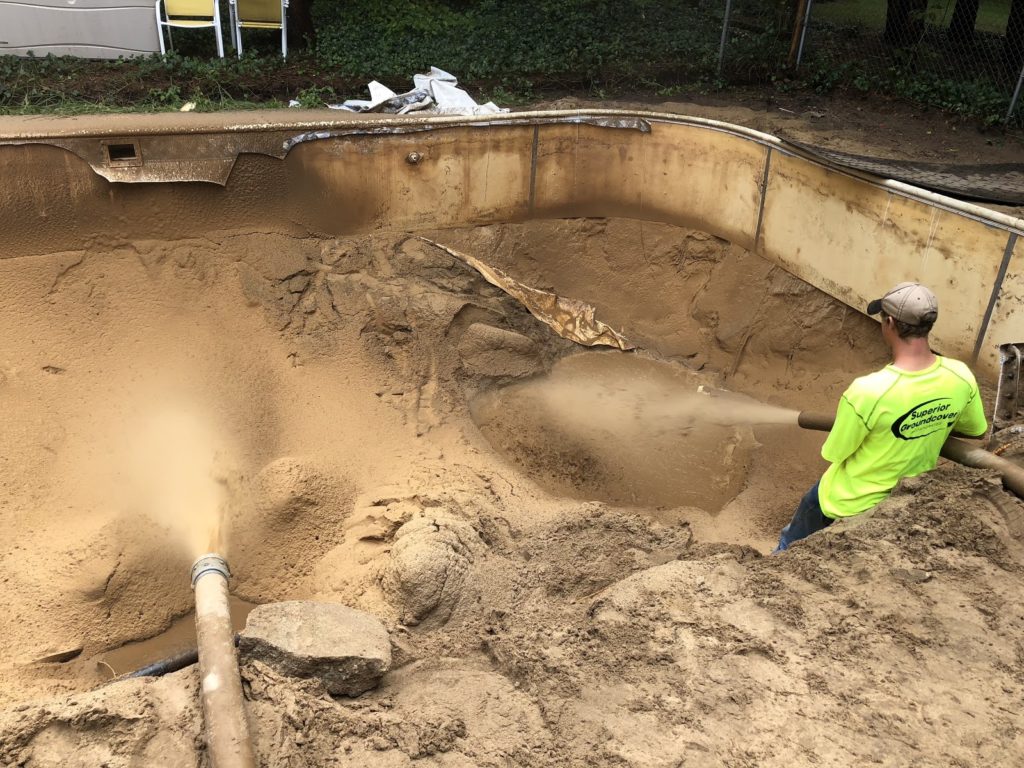
Step 4: Backfill Material Selection
Choosing the right backfill material is crucial for the stability and longevity of the filled area. Common backfill materials include gravel, sand, and dirt. Consult with a professional to determine the most suitable material for your specific pool removal project.
Step 5: Compaction of Backfill Material
After selecting the backfill material, it’s essential to compact it properly to prevent settling and ensure a solid foundation. Use a compactor or a heavy roller to compact the material in layers, ensuring even distribution and maximum stability.
Step 6: Sloping and Grading
Once the backfill material is compacted, it’s time to slope and grade the filled area. Proper sloping and grading will help with water drainage and prevent any potential issues such as pooling or erosion in the future.
Step 7: Final Inspection
After backfilling, it’s essential to conduct a final inspection of the filled area to ensure everything is done correctly. Check for any uneven spots, proper compaction, and adequate sloping to address any issues before completing the project.
Step 8: Landscaping and Restoration
Once the backfilling process is complete, you can move on to landscaping and restoring the area around the filled pool. This may involve planting grass, installing a patio, or adding any other desired features to enhance the aesthetics of the space.
Benefits of Proper Backfilling
Proper backfilling of a pool offers several benefits, including:
- Preventing future sinkholes or settling
- Ensuring stability and safety of the area
- Preventing water accumulation and drainage issues
- Enhancing the overall aesthetics of the property
Conclusion
Backfilling a pool is a crucial step in the pool removal process, and it’s essential to do it correctly to avoid any potential issues down the line. By following the steps outlined in this guide and working with professionals when needed, you can ensure a successful backfilling project that enhances the safety and aesthetics of your property.