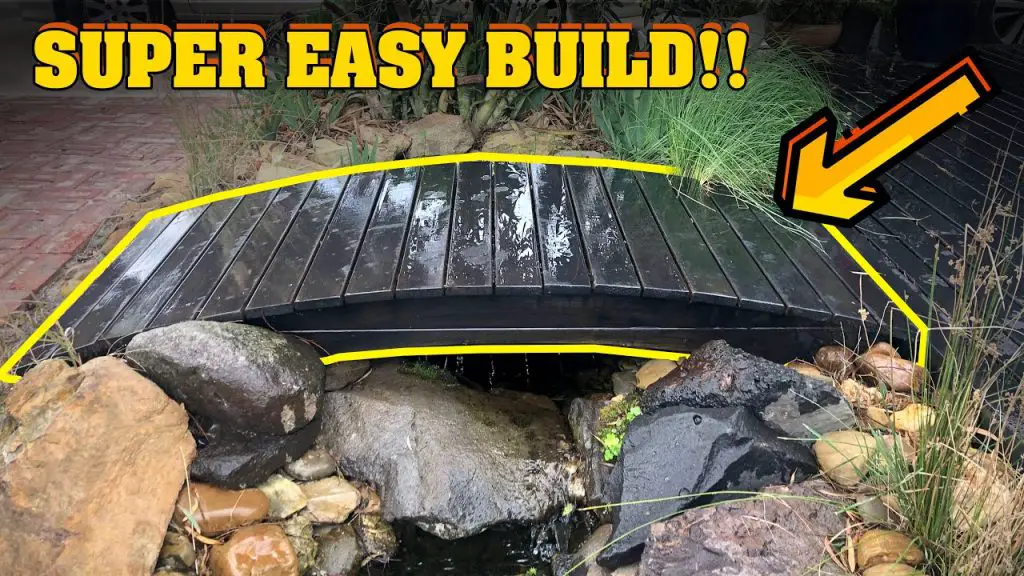
Adding a beautiful arched bridge over a pond can elevate the aesthetics of your outdoor space and create a charming focal point. Whether you’re a seasoned DIY enthusiast or a beginner looking for a fun project, building an arched bridge can be a rewarding and fulfilling endeavor. In this comprehensive guide, we’ll walk you through the step-by-step process of constructing an arched bridge over a pond, from planning and preparation to the finishing touches.
Step 1: Planning and Design
Before diving into the construction process, it’s crucial to start with a well-thought-out plan and design. Begin by considering the size of your pond and the ideal location for the bridge. Measure the width of the pond and determine the desired span of the bridge. Take into account the height and width of the arch, as well as the clearance needed for boats or other watercraft to pass under the bridge.
Next, sketch out a rough design for your arched bridge, considering both aesthetic appeal and structural integrity. You may want to incorporate materials such as wood, metal, or composite materials, depending on your preference and the surrounding landscape. Consider the style of the bridge, whether it’s a classic arched design or a more modern interpretation.
Step 2: Gathering Materials and Tools
Once you have a solid plan and design in place, it’s time to gather the necessary materials and tools for the construction process. The specific materials will depend on your chosen design and the overall aesthetic you’re aiming for. Common materials for building an arched bridge include pressure-treated lumber, galvanized steel hardware, concrete, and waterproof sealant.
Additionally, you’ll need a set of tools such as a circular saw, drill, level, measuring tape, and a sturdy ladder. Depending on the complexity of your design, you may also require specialized tools for cutting and shaping the arch, such as a jigsaw or a router.
Step 3: Preparing the Site
Before you start building the bridge, it’s essential to prepare the site properly. Clear any vegetation or debris from the area where the bridge will be constructed. If necessary, level the ground to ensure a stable and even foundation for the bridge. Consider using stakes and string to outline the path of the bridge, allowing you to visualize the final placement and alignment.
Step 4: Building the Foundation
The foundation is a critical component of the bridge’s structure, providing stability and support. Depending on the size and design of your bridge, you may opt for concrete footings or piers to serve as the foundation. Ensure that the footings are placed at appropriate intervals to support the weight of the bridge and distribute the load evenly.
When constructing the footings, it’s important to adhere to local building codes and regulations to ensure compliance and safety. Consider consulting with a professional if you’re unsure about the specific requirements for your area.
Step 5: Constructing the Arched Frame
With the foundation in place, it’s time to focus on the construction of the arched frame. This is where the design and aesthetics of the bridge truly come to life. If you’re using wood for the frame, consider selecting pressure-treated lumber for durability and resistance to rot and decay.
Begin by cutting the lumber to the desired lengths and angles, taking care to ensure precise measurements for a symmetrical and visually appealing arch. Assemble the pieces using galvanized steel hardware, such as screws and brackets, to create a sturdy and secure frame. Consider adding diagonal supports to reinforce the structure and enhance its load-bearing capacity.
Step 6: Installing the Decking
Once the arched frame is in place, it’s time to install the decking, which forms the surface of the bridge. Depending on your design, you may opt for traditional wooden planks, composite decking, or other materials that suit your aesthetic preferences. Ensure that the decking is securely fastened to the frame, providing a stable and safe surface for walking or crossing the bridge.
Step 7: Adding the Finishing Touches
With the structural elements of the bridge in place, it’s time to add the finishing touches that enhance its appearance and functionality. Consider applying a waterproof sealant to the wood to protect it from moisture and UV damage. Additionally, you may choose to paint or stain the bridge to complement the surrounding landscape and tie the design together.
Landscaping around the bridge can further enhance its visual appeal, whether it’s adding plants, flowers, or decorative elements that blend seamlessly with the natural environment. Consider installing lighting to illuminate the bridge at night, creating a captivating and inviting atmosphere.

Credit: www.instructables.com
Step 8: Maintenance and Care
Once your arched bridge is complete, it’s important to establish a routine maintenance schedule to ensure its longevity and structural integrity. Regular inspections for signs of wear, rot, or damage are crucial for addressing any issues promptly. Depending on the materials used, periodic cleaning and resealing may be necessary to protect the bridge from the elements.
By staying proactive with maintenance, you can preserve the beauty and functionality of your arched bridge for years to come, allowing you to enjoy its charm and elegance season after season.

Credit: www.pinterest.com
Conclusion
Building an arched bridge over a pond is a captivating and fulfilling project that can significantly enhance the visual appeal of your outdoor space. With careful planning, attention to detail, and the right tools and materials, you can create a stunning and functional bridge that becomes a focal point of your landscape. Whether you’re looking to add a touch of charm to your backyard or create a picturesque feature for a larger property, an arched bridge over a pond is a timeless addition that brings beauty and character to any setting.
Remember to consider the overall design, materials, and maintenance requirements to ensure that your arched bridge stands the test of time and continues to be a cherished element of your outdoor environment.
Embrace the opportunity to embark on this rewarding DIY project, and enjoy the satisfaction of bringing your vision to life with a beautifully crafted arched bridge over a serene pond.


