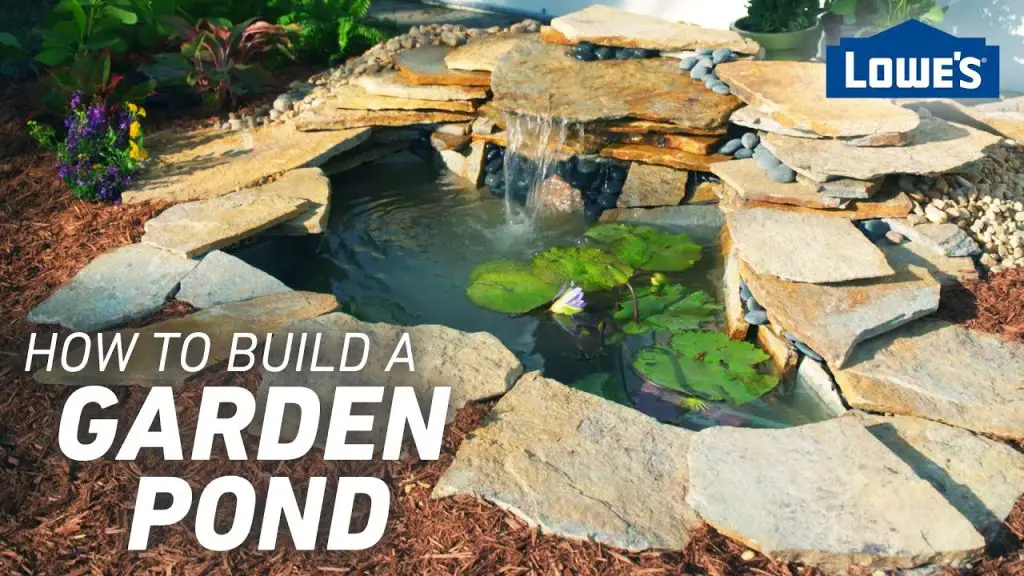
Water ponds have the power to transform any outdoor space into a serene oasis. Whether you’re looking to add a focal point to your garden, create a habitat for aquatic plants and wildlife, or simply enjoy the soothing sounds of water, building a water pond can be a rewarding and fulfilling project. In this comprehensive guide, we’ll take you through the step-by-step process of creating your very own water pond.
Step 1: Planning and Design
Before you start digging, it’s crucial to carefully plan and design your water pond. Consider the location, size, and shape of the pond, taking into account the existing landscape and the overall aesthetic you want to achieve. Think about whether you want a formal or natural-looking pond, as well as whether you want to incorporate features such as waterfalls, fountains, or bridges.
Creating a rough sketch or using design software can help you visualize the layout and make any necessary adjustments before you begin the physical construction.
Step 2: Choosing the Right Location
The location of your water pond is key to its success. Look for a spot that receives a good balance of sunlight and shade, as excessive sunlight can lead to algae overgrowth and water evaporation, while too much shade can hinder the growth of aquatic plants. Additionally, consider the proximity to trees to avoid issues with falling leaves and roots invading the pond.
Ensure that the area is also easily accessible for maintenance and that it won’t interfere with any underground utilities or drainage systems.
Step 3: Gathering the Necessary Tools and Materials
Once you have a clear plan and location in mind, it’s time to gather the tools and materials you’ll need for the construction of your water pond. Here’s a basic list to get you started:
- Shovel and spade for excavation
- Pond liner or preformed pond shell
- Pump and filtration system
- Rocks and gravel for edging and decoration
- Aquatic plants and fish (if desired)
- Water testing kit
- Leveling tools
Depending on the specific design and features of your pond, you may require additional tools and materials.
Step 4: Excavation
With your tools and materials at the ready, it’s time to start digging. Use a hose or spray paint to outline the shape of your pond on the ground, then begin excavating the area to the desired depth and shape. Be mindful of any slope or gradient you want to incorporate, as this will affect the overall look and functionality of the pond.
As you dig, periodically check the depth and shape to ensure that it aligns with your design. Once the excavation is complete, use a level to make sure the bottom of the pond is even and flat.
Step 5: Installing the Pond Liner
Once the excavation is finished and the area is prepared, it’s time to install the pond liner. Whether you opt for a flexible pond liner or a preformed pond shell, ensure that it is securely placed and free of any wrinkles or creases that could cause leaks. Use rocks and gravel to anchor the liner in place and create a natural-looking edge.
Step 6: Adding the Pump and Filtration System
A pump and filtration system are essential for maintaining the water quality and circulation in your pond. Install the pump at the appropriate depth, ensuring that it is securely positioned and connected to the filtration system. Consider the size and capacity of the pump based on the volume of water in your pond and any additional features such as waterfalls or fountains.
Step 7: Adding Decorative Elements
Enhance the visual appeal of your water pond by adding decorative elements such as rocks, gravel, and aquatic plants. Arrange rocks around the edges of the pond to create a natural border, and use gravel to cover the pond liner and create a more polished look. Introduce a variety of aquatic plants to add color, texture, and oxygenation to the water.

Credit: www.gardenbenches.com
Step 8: Filling and Testing the Water
Once all the components are in place, it’s time to fill the pond with water. Use a hose or a combination of tap water and rainwater to fill the pond to the desired level. As the water fills, add a dechlorinator to neutralize any chlorine or chloramine present in the tap water. Use a water testing kit to check the pH, ammonia, nitrite, and nitrate levels, making any necessary adjustments to ensure a healthy environment for aquatic life.

Credit: www.youtube.com
Step 9: Introducing Aquatic Life
If you’ve decided to include fish or other aquatic life in your pond, now is the time to introduce them. Choose a variety of fish species that are compatible with the size and conditions of your pond, and acclimate them to the water temperature before releasing them. Be mindful of the balance between plants, fish, and other organisms to maintain a thriving ecosystem.
Step 10: Maintenance and Care
Once your water pond is complete, it’s important to establish a regular maintenance routine to keep it healthy and beautiful. This includes tasks such as removing debris, monitoring water quality, trimming plants, and servicing the pump and filtration system. Regular maintenance will help prevent issues such as algae overgrowth, stagnation, and imbalanced water chemistry.
Conclusion
Building a water pond is a fulfilling and creative endeavor that can bring a sense of tranquility and natural beauty to your outdoor space. By carefully planning, designing, and executing each step of the process, you can create a stunning water feature that will be enjoyed for years to come. Whether you’re a seasoned DIY enthusiast or a first-time pond builder, the rewards of creating your own water pond are well worth the effort.
So, roll up your sleeves, gather your tools, and embark on the journey of building your very own water pond. The result will be a breathtaking addition to your outdoor environment that will be sure to impress and delight all who encounter it.


