Having a pond in your backyard can be a beautiful and serene addition to your landscape. However, a leaking pond can quickly turn this peaceful oasis into a headache. If you’ve noticed that your pond is losing water, it’s crucial to address the issue promptly to prevent further damage.

Credit: m.youtube.com
Identifying the Leak
The first step in sealing a leaking pond is to identify the source of the leak. Common signs of a leak include a noticeable drop in water level, wet spots around the pond, or an increase in water bills. Once you’ve confirmed that your pond is leaking, it’s time to determine the location of the leak.
One effective method for identifying the leak is to fill the pond to its normal level and mark the water level with a piece of tape. Monitor the water level over a 24-hour period to see if it drops below the marked line. If the water level decreases, you’ve likely found the location of the leak.

Credit: www.texasbentonite.com
Choosing the Right Pond Sealer
Once you’ve identified the leak, the next step is to select the right pond sealer to repair it. There are several types of pond sealers available on the market, including bentonite clay, liquid rubber, and epoxies. The type of sealer you choose will depend on the size of the leak, the material of your pond, and your budget.
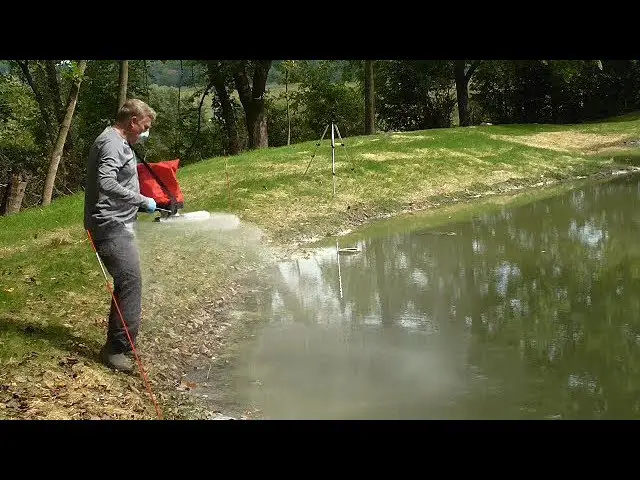
Bentonite clay is a popular choice for sealing leaking ponds as it is natural and environmentally friendly. Liquid rubber sealers are another effective option for repairing leaks in ponds made of concrete, stone, or rubber liners. Epoxies are best suited for smaller leaks and can provide a long-lasting solution.
Preparing the Pond Surface
Before applying the pond sealer, it’s essential to prepare the surface of the pond to ensure proper adhesion. Start by draining the pond completely and allowing the surface to dry thoroughly. Remove any debris, algae, or vegetation from the area around the leak to create a clean and smooth surface.
If your pond is made of concrete, consider using a wire brush to scrub the surface and remove any loose particles. For rubber or plastic ponds, clean the surface with a mild detergent and water to remove any dirt or grime. Once the surface is clean and dry, you’re ready to apply the pond sealer.
Applying the Pond Sealer
When applying the pond sealer, be sure to follow the manufacturer’s instructions carefully for the best results. Start by mixing the sealer according to the recommended ratio and apply it to the leak area using a brush or roller. Make sure to cover the entire leak area thoroughly with a thick and even coat of sealer.
Allow the sealer to dry completely before refilling the pond with water. Depending on the type of sealer you’ve chosen, this process may take anywhere from a few hours to a few days. Once the sealer has cured, refill the pond and monitor the water level to ensure that the leak has been successfully repaired.
Maintaining Your Pond
After sealing the leak in your pond, it’s essential to maintain it properly to prevent future leaks from occurring. Regularly inspect the pond for any signs of damage or wear and tear, such as cracks, holes, or tears in the liner.
Keep the water level in the pond consistent to prevent stress on the liner and avoid overfilling the pond, which can put pressure on the seams and cause leaks. Additionally, remove any debris or sharp objects from the pond regularly to prevent punctures or tears in the liner.
By following these maintenance tips and addressing any leaks promptly, you can enjoy a beautiful and leak-free pond in your backyard for years to come.
Conclusion
Sealing a leaking pond is a manageable task that can be completed with the right tools and techniques. By identifying the leak, choosing the appropriate pond sealer, preparing the surface, and applying the sealer correctly, you can effectively repair leaks in your pond and prevent further damage.
Remember to maintain your pond regularly to ensure its longevity and prevent future leaks. With proper care and attention, you can enjoy the beauty and tranquility of your pond without the worry of leaks or water loss.


